|
|
Porting
Fonts Across Platforms:
Number 7B |
 |
|
|
|
|
|
|
Porting PC Type 1 Fonts To The Mac®
With PC TransType
Click here
for more on working with TransType
Click here
for legal note on fictitious font name used in this
tutorial
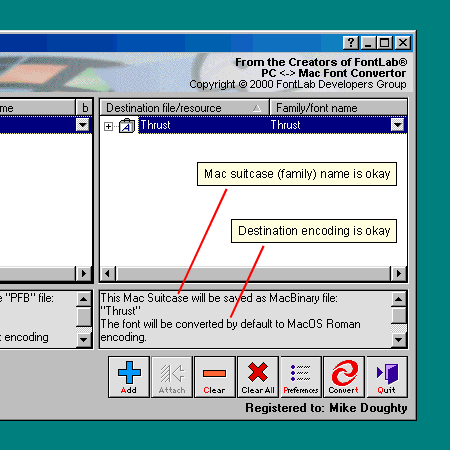
4. The output specifications in the legend
panel under the destination list show that the Mac suitcase
name is right and that the destination encoding is right
(Mac OS Roman). The importance of getting the right
encoding is mentioned here,
and the importance of getting the right menu name is
mentioned here.
To find out more about how to customize Mac suitcases
in TransType, click
here. To find out more on selecting destination
encoding, click
here.

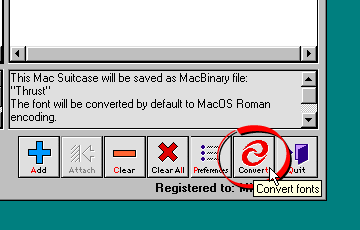
5. Click the "Convert" button
to convert the font.

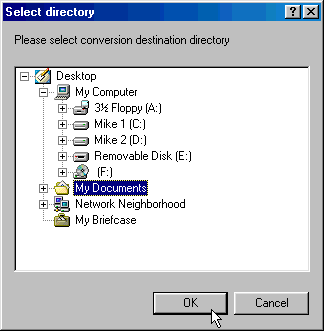
6. TransType will display a window asking
you where to output the converted font. Select the destination
folder and click "OK".

7 In this case we setup the preferences
to output Mac files in MacBinary format (more
here on setting up TransType preferences). TransType
will create two MacBinary files. (more
here on the MacBinary format). Copy these files
to the Macintosh® computer
either by using a PC-formatted disk or by sending them
over a network (more
here on copying files between Mac and PC).

8. Next, you need to decode the MacBinary
files on the Macintosh. This step expands each font
file into the necessary resource fork required by the
Mac (more here
on the Mac file system). In this case we are using
MacBinary II+ (freeware...more
details found here). Once the files are restored,
you can install the font by copying them to the Fonts
folder in the Macintosh System folder.

Click
Here To Continue...
|