|
|
Understanding
The TransType Interface
Part Three |
 |
|
|
|
|
|
|
To find out more about TransType and where
to get it, click
here
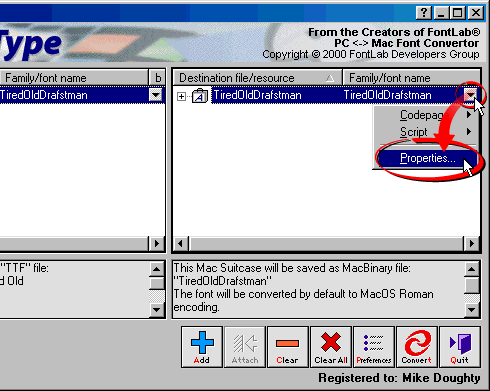
7. You can access the destination font
properties by clicking the drop-down arrow next to a
selected font.

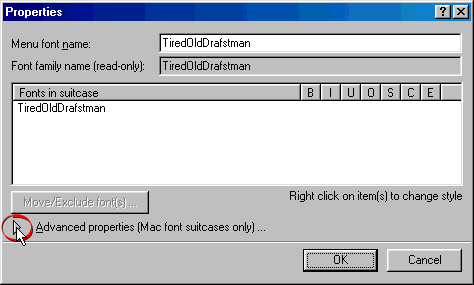
8. In the following
dialog you can customize the Mac®
suitcase generated in the conversion. Here you can combine
fonts into a single family and make adjustments to the
font's menu name. This is one of the important points
about font conversion (more
here). You can set the style for each font in the
family suitcase to bold, italic, underlined, outlined,
shadow, condensed or emphasized.
You also can access the advanced properties
for Mac suitcases by clicking the twirl-down (circled
below).

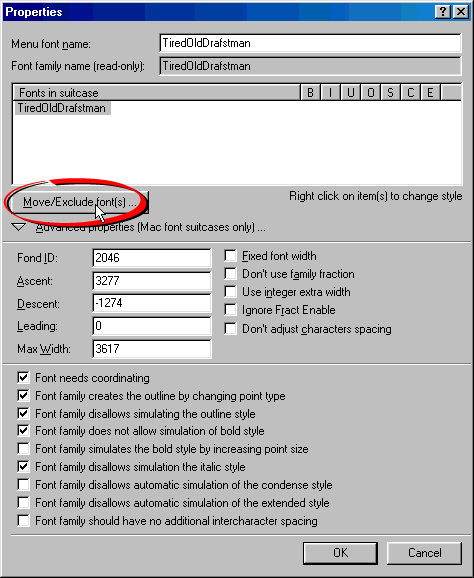
9. Shown below are the advanced properties
dialog for Mac suitcases. Click the "Move/Exclude
font(s)" button to move or exclude a font from
the Mac suitcase of the converted font.

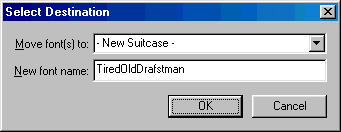
10. When you click the "Move/Exclude
font(s)" button you access a window where you can
move a font to another suitcase or create a new suitcase.
This becomes important when organizing fonts into families
(more
here).

Click
Here To Continue...
|