|
|
Deneba
Canvas™ 6 Transparent Drop Shadow - Part Two |
 |
|
|
|
|
|
|
Optional Steps For GIF Image
Please see this
page for full explanation on transparent drop shadows.
To make the GIF version of the drop shadow effect with
the excess background pixels trimmed away we need to apply
a channel mask to the background object (click
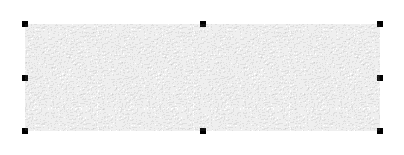
here for why this is done). First we need to resize
the background object to the same size as the shadow object.
If the background object is a different size then Canvas
will stretch the mask to fit.
13. Select the shadow object (on layer 2) and bring
up the Transform palette and make a note of its x and
y coordinates along with its width and height. Set the
scaling button for non-proportional scaling (circled)
so you can resize the background object to different proportions.

14. In the palette you have to obtain the absolute x and
y coordinates. Do so by clicking the small triangle above
the scaling proportion button and choose "Absolute".

15. Select the background object and enter the x and y
coordinates and the width and height noted in the previous
step into the Transform palette. The background object
is now the same size and location as the shadow object.
 |
|
Note: An
alternative method to the above would be to select
the shadow object, then click Edit > Copy,
then Object > Lock. Then select the background
object and click Edit > Paste Attributes,
and choose "Dimensions" in the dialog.
Then click Object > Align and choose Align
to: Each Other, using vertical and horizontal centers. |
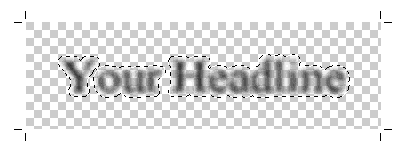
16. Deselect everything. Double-click the Wand tool  and set the tolerance to zero with no anti-aliasing. Click
the shadow object to place it in edit mode. Then click
anywhere in the transparent portion of the object to make
the selection. Next click Image > Select > Inverse
to invert the selection then click Image > Select
> Save and save this selection to a new channel
(more help
here). We are going to use this new selection to create
the channel mask.
and set the tolerance to zero with no anti-aliasing. Click
the shadow object to place it in edit mode. Then click
anywhere in the transparent portion of the object to make
the selection. Next click Image > Select > Inverse
to invert the selection then click Image > Select
> Save and save this selection to a new channel
(more help
here). We are going to use this new selection to create
the channel mask.
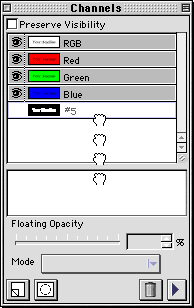
17. Bring up the Channels palette and drag and drop
the new selection into the channel mask slot. Then press
Esc (Windows®) or Enter (Mac®)
twice to defloat the selection and end edit mode.
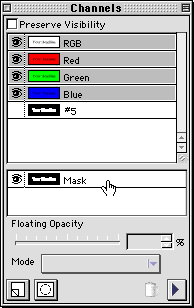
18. With the shadow object still selected click Object
> Transparency > Detach Mask.

19. Deselect everything. Next select only the
detached channel mask using the context menu. If everything
was done right, it will be the second object in the
list. For more help on selecting objects in a stack
click here.
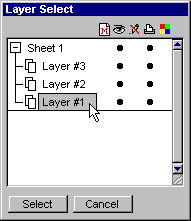
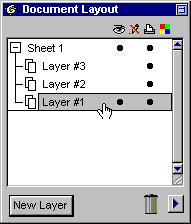
20. Next click the Send to Layers button  on the tool bar. In the "Layer Select" dialog
choose layer 1 and click "Select" (below left).
This places the mask object on top of the stack
in layer 1. Next activate layer 1 in the Document Layout
palette and hide layers 2 and 3 (below right). For more
help on layers click
here.
on the tool bar. In the "Layer Select" dialog
choose layer 1 and click "Select" (below left).
This places the mask object on top of the stack
in layer 1. Next activate layer 1 in the Document Layout
palette and hide layers 2 and 3 (below right). For more
help on layers click
here.
 |
 |
21. Now we want to attach this mask to the background
object. Note: The mask object
must be on top of the background object in the stacking
order. When it was sent to layer 1 in the previous step
it was automatically placed on top of the stack. However,
it is not necessary for the mask object to be aligned
with the background object. It can be anywhere on the
page. Drag a selection marquee around the
background object plus the mask object to select them
both. Then click Object > Transparency > Attach
Mask. This will attach the channel mask to the background
object but the original mask object remains. To get
rid of it deselect everything, then select the mask
object using the context menu and press the Delete key.
22. Using the Document Layout palette make layers 2
and 3 visible again.
At this point you can export
it as a GIF image.

Click
Here To Continue...
|