|
|
Object
Control - One Of The The Keys To Mastering Canvas™
6 |
 |
|
|
|
|
|
|
Deneba Canvas 6 supports layers. It is extremely flexible
in that it allows vector, text and bitmap objects to
coexist across multiple layers or to be stacked together
in a single layer. Often, you will need to place objects
directly on top of each other. Selecting objects hidden
under other objects can be a challenge. You can spread
objects amongst layers to make it easy to select and
edit them individually.
Layers and Object Stacks
Each layer has its own stack. When you issue commands
such as bring to front, send to back, shuffle down and
shuffle up, the commands affect only objects on the
current layer. When you begin to work with multiple
layers, you need to bear in mind the effects of duplicating
and moving objects between layers. There can be little
or no change to the screen display, but there may be
major changes to your composition.
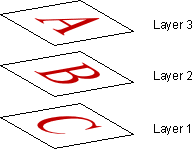
1. Below is a diagram showing objects A, B and C on
layers 3, 2 and 1 (below left). Object A is on top and
is the only one visible (below right). You can easily
select object A, B or C using the Document Layout palette.
Simply hide the layers containing objects you don't
want to select.
Layers View
 |
What you see
 |
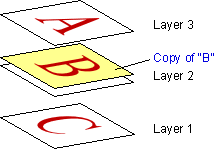
2. Now let's select and copy object B with Edit
> Duplicate or Edit > Replicate with
no offset. The duplicate object "B" is in
a stack of two objects on layer 2. There are some important
points to be made here:
a.) The duplicate object "B" (shown in yellow
for emphasis) is placed directly on top of
its original. If you want to select the original then
you need a means to select objects that lie directly
beneath other objects.
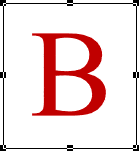
b.) Immediately after duplicating the original object
"B" it becomes unselected
and the duplicate is now selected so you need to be
aware of which object you are working with (there is
no change to the screen display).
Layers View
 |
What you see
 |
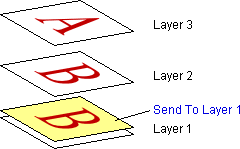
3. Now click the Send To Layers button on the toolbar
 or click Object > Arrange > Send To Layers.
A palette will appear. Choose layer 1 and click "Select".
Some more important points need to be made here:
a.) The view on the screen does not change. You see
the same thing as in the previous step.
b.) When you send to layers, the object is placed at
the top of the stack on the target layer.
c.) The object is still selected, but on a different
layer.
You are seeing only one object - the duplicate "B"
object. Everything above and below it is hidden from
view while it is selected. If you deselect all objects,
the view will change and object "A" will be
showing again.
Layers View
 |
What you see
 |
This simple little demonstration says an awful lot
about how to work with Canvas. You need to be aware
of these points and know what you are looking at on
the screen so you can stay in control.
Using The Context Menu To
Select Objects Within a Stack
When you have an object stack on one layer, you select
objects with the Context menu. Position the mouse
pointer directly over the top object in the stack, then
Right-Click (Windows®)
or Control-Click (Mac®).
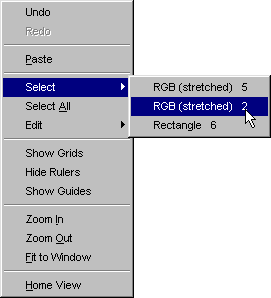
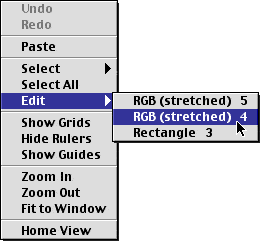
This will bring up the following context menu (the contents
will vary depending upon the operation):
This is the Windows version...
 |
|
|
| Use the "Select"
menu item when selecting and not editing an item
in the stack. |
| |
The context menu can be used for both selecting and editing.
When you need to edit an object in the stack, use the
"Edit" menu item to avoid double-clicking the
mouse. Doing so would run the risk of inadvertently repositioning
the object or activating a paint tool.
This is the Mac version...
 |
|
|
| Use the "Edit"
menu item when editing an item in the stack to avoid
double-clicking. |
| |
 |
|
Tip:
To edit an unselected paint object at the top of
the stack directly under the mouse pointer, click
on the object with any paint tool. This will put
the object into edit mode. |
The objects listed in the stack are in the same physical
order as in the document. Objects at the top of the list
are in the top of the stack and objects at the bottom
of the list are at the bottom of the stack. Additionally,
the list is a complete list of all objects across all
layers that lie directly under the mouse pointer when
clicked, not just the stack of objects on the current
layer.
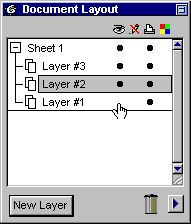
Using The Document Layout Palette
In the above scenario at step 2 where object "B"
was selected then copied, the easiest way would be to
use the Document Layout palette.
Click visibility bullets to hide layers
(you can only hide layers which are
not activated).
 |
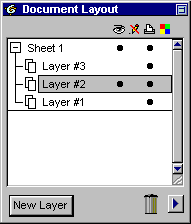
The highlighted layer means it is
activated. Here objects on layer
2 can easily be selected.
 |
Using The "Find"
Command
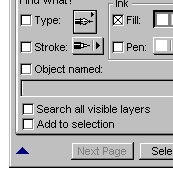
One of the most powerful ways to select objects is
with the "Find" command. Canvas lets you select
objects based on their attributes. One application
for this is managing spot color separations. In the
example below, you can globally select and replace fill
inks with the find command:
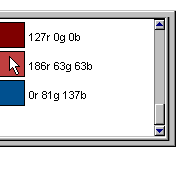
| Click Edit > Find, then in the
palette, select the color you wish to find
and select for replacement |
|
 |
 |
 |
 |
 |
 |
 |
 |
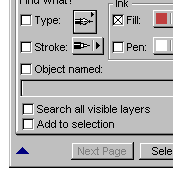
| Next click "Select". All objects
filled with the chosen ink will be selected.
You are just a click away from assigning a
new fill ink. |
|
 |
 |
 |
 |
 |
 |
 |
|
Click
Here To Continue... |