|
|
"Finesse"
Text Effect With Canvas™ 7
Part Three |
 |
|
|
|
|
|
|
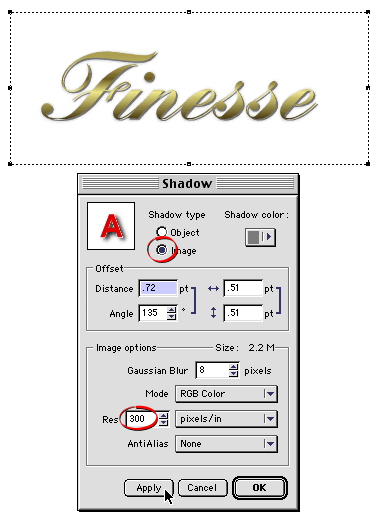
11. Next, click Effect > Shadow again. Use
the same settings as before only this time be sure to
choose an "Image" shadow type with a resolution
of 300 ppi (circled, below). A high resolution such
as this is best for printed output. Click "OK"
when done. This time Canvas creates a paint object and
places it under the text object. With the soft shadow
object still selected and with the view magnification
at 100%, nudge it twice with the down arrow key and
twice with the right arrow key. This moves it down and
to the right two pixels each.

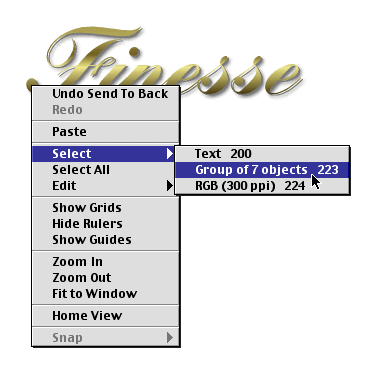
12. On the toolbar, click the "Send To Back"
button  to send the new paint object to the bottom of the stack.
Control + click (Mac®) or
Right-click (Windows®) on
the text and select the middle object in the stack (the
vector shadow).
 |
|
Note:
In this tutorial we are using the stacking order
to work with objects. If you find it easier to work
with layers, then you can create a separate layer
for each object. |

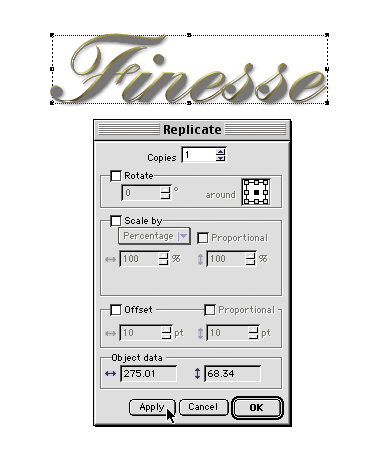
13. We want to copy the vector shadow object in the
same position. Click Edit > Replicate and
choose one copy with no offset. The new object will
be placed at the top of the stack (below).
Select this new object and click the "Shuffle
Down" button  to send it behind the text object.
Repeat this step to create another copy of the vector
shadow object and use the "Shuffle Down" button
again to send it behind the text object.

Click
Here To Continue...
|