|
|
Canvas™
7 Aqua Button Tutorial
Part One |
 |
|
|
|
|
|
|
Aqua "gel" buttons are very popular these
days and the effect just begs to be done in Canvas 7
with SpriteEffects™. This effect can be done by
anyone with intermediate level skills in Canvas. There
are many pixel-based examples of this effect, but this
tutorial shows how it can be created with vector objects
in Canvas. The idea is similar to the technique used
in a Paint Shop Pro™ tutorial I saw once.
1. First choose the Rounded Rectangle tool from the
Toolbox and drag out a rounded rectangle approximately
like the one shown below.
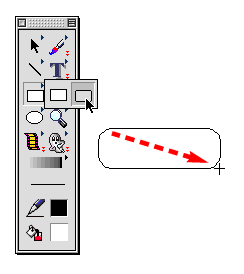
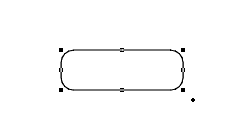
2. When you release the mouse button, the object on
your screen should look similar to the one shown here.
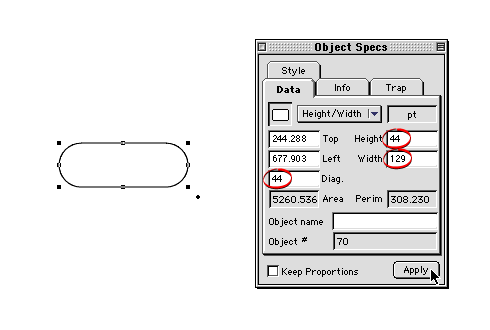
3. In this tutorial the document is setup for points
as the unit of measure. Click Layout > Document
Setup to access the dialog and choose "Points"
for the Document units. Next, bring up the Object Specs
palette and enter the specs for the height, width and
daimeter of the rounded corners (shown circled below).
Enter 44 for the "Height", 44 for the "Diag."
and 129 for the "Width". Click the "Apply"
button when done. Each end
of the rounded rectangle is in the shape of a semicircle.
Note that the height of the rectangle must be equal
to the "Diag." amount (44 points in the example
below) for the ends of the rounded rectangle to be semicircular
in shape.
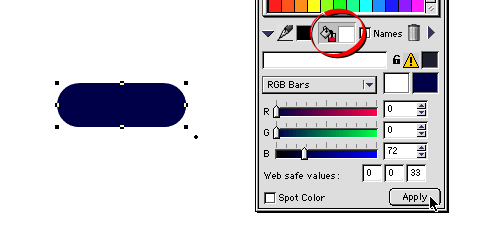
4. Next, we need to create a new color ink. Bring up
the configuration manager in the Color tab of the Inks
palette. For more help with creating a new color ink,
please click here.
Select the "RGB Bars" from the Color manager
and enter 0, 0, 72 for the red, green and blue values,
respectively. Make sure the rounded rectangle is still
selected, then depress the Fill icon (circled below)
and click the "Apply" button. The rectangle
should look similar to the one shown below.
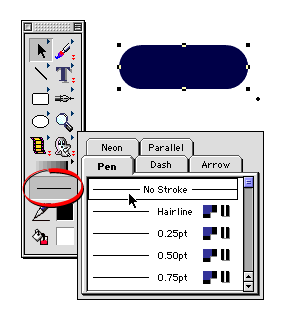
5. Next click the Strokes icon on the Toolbox and choose
"No Stroke" from the Pen tab. The rectangle
should now have a color fill with no stroke.
Click
Here To Continue...
|