|
|
| |
|
|
 |
| |
| |
|
Intermediate |
|
| |
|
|
Taking
Control of Inks in Canvas™ 6
Part One |
 |
|
|
|
|
|
|
In Deneba Canvas the Inks palette is the control center
for the creation and management of inks. You can load,
append, save and clear new sets of colors, gradients,
textures, symbols and hatches as well as modify existing
sets with new inks. In this tutorial we will create
and add a custom color and a custom texture. This is
but a small sampling of what you can do.
Creating a New Color Ink
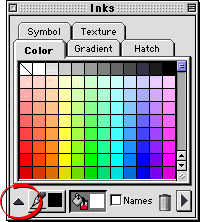
1. Start by clicking the triangle on the left of side
of the Inks palette to reveal the Color manager (below
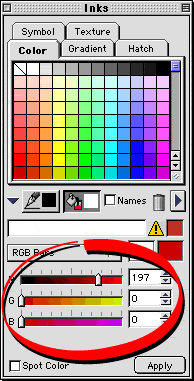
left). Using the RGB Bars, create a new color. You will
see a sample of the color in the preview box (below
right).
 |
 |
Click the triangle to reveal the
Color manager...
Adjust the RGB bars to
create the new color...
|
|
2. Next drag the new color from the preview box into
the the color inks grid with all the color ink tiles.
Assigning the Current Fill Ink
3. To assign a color as either the current stroke or
fill ink, make sure no objects are selected and click
either the stroke or fill ink icon (below left). Then
click the desired ink tile (below right). In the example,
the new color becomes the current fill ink.
 |
4. You will see the new current fill
ink at the bottom of the Toolbox
in the Inks palette. Note:
the stroke
and fill ink icons in the Toolbox
function identically to the ones in
the Inks palette shown above. You
can set the current stroke or fill
ink using either one. |
Click
Here To Continue...
|
|
 |
 |
 |
| |
Previous
Home
Contact Mike
Related Sites
Next
Copyright
© 1998-2016 Mike Doughty, All Rights Reserved Legal
Notices
Page Last Revised: October 26, 2016
Privacy Policy
|
|
|
|
|
|
|
|