|
|
Understanding
Channel s In Photoshop®
Part Two |
 |
|
|
|
|
|
|
Storing a Selection Mask as an Alpha Channel
When you make a selection mask in Photoshop,
the mask is an 8-bit grayscale image. When you save
a selection in the file, Photoshop has to put it somewhere,
so it is stored as a channel.
You can try this yourself. First you need
to make a selection with one or more selection tools.
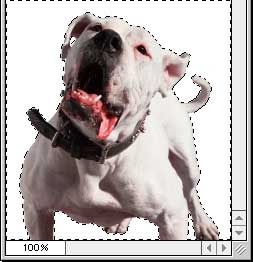
4. In this example we'll use the Magic Wand Tool  and select the white background pixels. The "Anti-aliased"
checkbox was checked in the Options palette. The selection
marquee appears as a row of "marching ants".
and select the white background pixels. The "Anti-aliased"
checkbox was checked in the Options palette. The selection
marquee appears as a row of "marching ants".
5. Now click Select > Save Selection
and click OK in the dialog to save it. Photoshop will
save the selection as a new channel by default.
6. Now the Channels palette shows the
new channel. Photoshop assigns the default name of "Alpha
1" to the new channel.
7. Click the "Alpha 1" channel
in the Channels palette.
8. Now the document window will display
the channel by itself.
|