|
|
Wha's
UUUp! Type Effect With Canvas™ 7
Part One |
 |
|
|
|
|
|
|
Here's another type effect tutorial for Canvas 7 that
uses SpriteEffects™. If you haven't already, I
suggest you take a look at the tutorial, Cool
Type Effect in Canvas 7 for an explanation of SpriteEffects
and how to render them for print or screen displays.
This tutorial arrives right on the heels of that one
and many of the points made there apply here as well.
What You Will Need For This Tutorial
This tutorial also uses the Extensis®
PhotoBevel plug-in. You can download it free of charge
from their web site at http://www.extensis.com.
If you have Photoshop®, install
it in the Photoshop Plug-Ins folder. If you don't have
Photoshop, then install it or move it to a different
folder and point to this folder in the preferences setup
(click here for
how to do this).
This tutorial uses the font, Beesknees. This font comes
with the PC versions of Microsoft Office 97, FrontPage
98 and FrontPage 2000. It may also be available in the
Office 2000 suite and may also be available in the Mac
version*. You need to install this font and make it
available to Canvas. If you don't have this font, then
you can pick a similar one.
*Font packages may vary. Check it out for yourself
before buying anything.
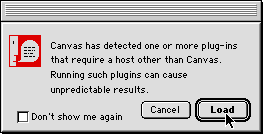
1. First, startup Canvas 7. If you setup the preferences
correctly you will see the following dialog:

You need to click the "Load" button to activate
the plug-in and make it available to Canvas.
 |
|
Note:
If you hand off a Canvas file to a service provider
that uses a third party plug-in for a SpriteEffect,
that same plug-in must be installed on their hard
drive for the effect to be rendered. |
2. Select the Text tool and type the phrase "Wha's
UUUp?" anywhere on the layout area.

3. Choose the Selection tool and the new text object
will be selected.

4. Set the font to 48 point Beesknees. This is what
your new text object should look like. The text should
appear black if the default pen ink is black.

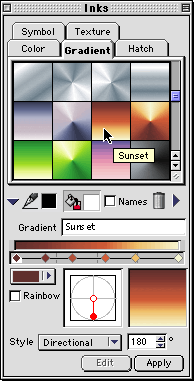
5. Bring up the Inks palette and click the "Gradient"
tab. Scroll down and click the "Sunset" gradient
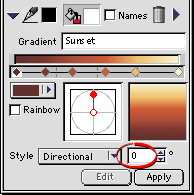
(below left). In the Gradient manager enter a zero in
the gradient angle text box (circled, below right).
 |
Enter a zero in the
gradient angle text box (circled).
 |
|
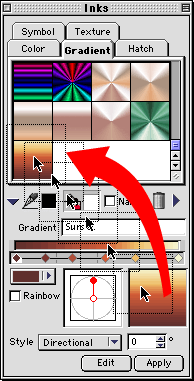
6. This turns the orientation of the gradient around
so the light color is on the top and the dark color
is on the bottom. Save this gradient by dragging it
from the preview box into the preset area in the Inks
palette.

7. Next, use the Text tool and select all of the text
in the new text object. Even though you can apply inks
by selecting the object itself with the Selection tool,
the result will be different. You can try this yourself
to see what I mean. For this effect, you must use the
Text tool to select the text.

Click
Here To Continue...
|