|
|
| |
|
|
 |
| |
| |
|
Intermediate |
|
| |
|
|
Photoshop®
Custom Textures - Part One |
 |
|
|
|
|
|
|
Obtaining Textures For Your Images
This first tutorial on the subject of textures illustrates
how to take advantage of a feature in Photoshop®
that allows the loading of textures via the command:
Filter > Texture > Texturizer > Load Texture
Before you can load any textures, you have to obtain
them or create them. Adobe includes several textures
on the Photoshop Application CD-ROM disk. In the GOODIES
folder on the CD there is a sub-folder called TEXTURES.
Simply drag and drop this folder onto your hard disk.
You may put it in the Photoshop application folder,
but this is not required.
Textures are simply Photoshop grayscale .PSD files from
which the texture information is applied with the above
filter. It is not required that the image be saved in
grayscale format. The texture can just as well be saved
in color although Photoshop only uses the grayscale
data in the file. There is an advantage to saving it
in grayscale format to save disk space.
Because these texture files are simply grayscale images,
this offers great flexibility in obtaining and/or cloning
them. One great source for textures is Paint Shop Pro™
5.0. If you accepted the default folders during the
installation of Paint Shop Pro 5.0 on your system there
will be a folder:
C:\Program Files\Paint Shop Pro 5\Papers
In this folder are paper texture files with the file
extension .TEX. Open the files in Paint Shop Pro 5 and
save them as .PSD files. You can then apply these textures
on Photoshop images in the same manner as the ones supplied
with Photoshop.
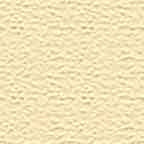
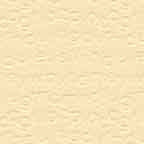
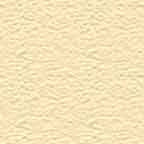
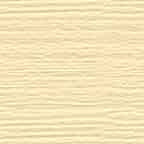
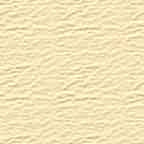
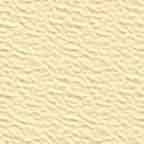
The following background tiles were all made very rapidly
in Photoshop by applying the texture filter using the
"Load Texture" option. The textures were made
from .PSD files using the Paint Shop Pro 5 .TEX files
located in the "Papers" folder.
Background Tiles For Web Pages
| To download in Windows®: |
|
Right click image and select "Save
Image As..." |
| To download in Mac®: |
|
Drag image onto the Desktop |
|
|
The tiles were all made by duplicating a single file with
a uniform color background. To make these yourself click:
File > New
Make a new 2" x 2" RGB image at 72 pixels
per inch. Click the foreground color square in the color
palette and set the color values to R=247, G=228 and B=186.
Then click the bucket tool and flood fill the image with
the new color. Save the file in JPEG format. Duplicate
the file as many times as you want with the command:
Image > Duplicate
Then apply a texture to each image with the command:
Filter > Texture > Texturizer > Load Texture
Then select from the .PSD texture files on your hard disk.
Click
Here To Continue... |
|
|
|
|
| |
Previous
Home
Contact Mike
Related Sites
Next
Copyright
© 1998-2016 Mike Doughty, All Rights Reserved Legal
Notices
Page Last Revised: October 26, 2016
Privacy Policy
|
|
|
|
|
|
|
|