|
|
Creating
Stroked Text In QuarkXPress™
Part One |
 |
|
|
|
|
|
|
It used to be that the only way you could
create a stroked text effect in Quark™ was to use
another application (such as Adobe®
Illustrator®). You first had
to create the effect, then save it as an EPS file, then
place it into a Quark picture box as an image:
QuarkXPress version 4.0 or later supports boxes of
any shape. You can create a box in the shape of the
text, then stroke it using Item > Modify >
Frame. This tutorial shows both ways. You may still
want to use the old way because you have more control
over the effect.
Using Adobe Illustrator To Create The Effect
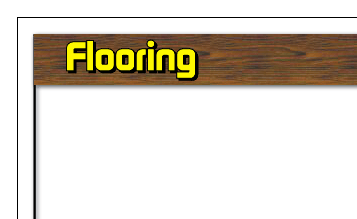
1. Create the text in Illustrator, then click Type
> Create Outlines. This will create a group of
vector objects (paths) which are no longer editable
as text. Give it a stroke and fill of your choice. In
this example I used the CMYK color model. The fill is
100% yellow and the stroke is 100% black. For a little
flair I added a solid black drop shadow by making a
copy, giving it a black fill then sending it to back:

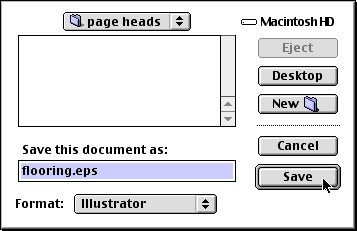
2. Save the art as an EPS file. Make sure to save it
with a preview image so you can see it in the layout
when you work in QuarkXPress.
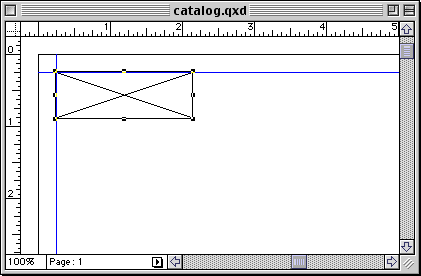
3. Open your QuarkXPress file and make a picture box.
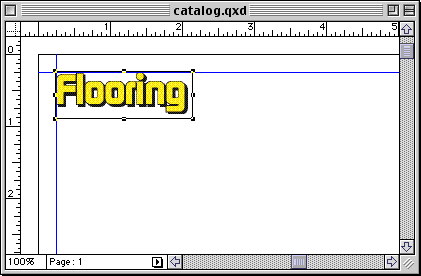
4. With the Content tool selected, click File >
Get Picture,
then navigate to the EPS file on your drive. Click "Open"
to load the EPS file into the picture box.
Click
Here To Continue...
|