|
|
PostScript®
Printing Without a Printer- Windows® 98 - Part
One |
 |
|
|
|
|
|
|
One of the most basic techniques in desktop publishing
is to print to a PostScript device in order create a
PostScript file. The resulting .ps (or .prn) file can
be distilled into an PDF file with Adobe® Acrobat®
Distiller® or opened in an illustration program like
Adobe® Illustrator®, Macromedia® FreeHand®,
CorelDRAW® or Deneba Canvas™. Once opened in
one of these programs the file can be edited or saved
as an EPS file which can be placed into your layouts
or used in a variety of different ways. This is a basic
technique for porting files using PostScript.
Note: If you plan to print TrueType® fonts using a
PostScript printer in Windows, please
see this very important tutorial on avoiding font substitution. Click
here for a tutorial on how to configure the PostScript
printer to avoid font substitution.
This tutorial is for Windows 98. For setting up a PostScript
printer in Windows XP see
this tutorial.
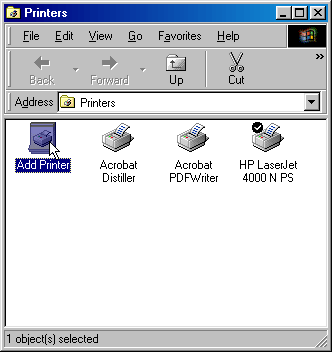
1. Start by clicking Start > Settings > Printers.
You will see a folder with all your installed printers.
Click the "Add Printer" icon.
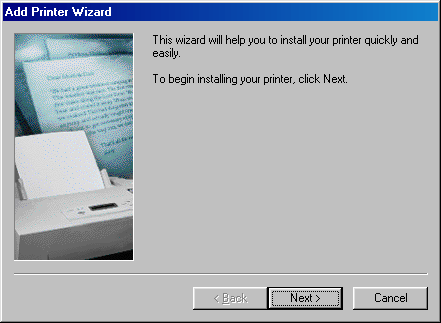
2. This will start the "Add Printer Wizard".
Just follow the prompts in the wizard. Click the "Next"
button.
Click
Here To Continue...
|