|
|
Spinning
Globe Tutorial
Part Three - Animating The Frames |
 |
|
|
|
|
|
|
This part is the most fun because you get to see how
your animation comes together. This last part uses Jasc®
Animation Shop™ but it could just as easily be
completed with GIF Construction Set™.
 |
|
Note: Photoshop®
version 5.5 includes Adobe®
ImageReady® which provides
a much faster way to animate the frames. There is
no need to export each frame as individual GIF files
with ImageReady. The following steps are included
for those who don't have ImageReady or other software
that will make an animated GIF directly from layers.
|
1. Start Animation Shop and create a new animation
48 x 48 with a transparent background. When you click
"OK" you will see the following window:
2. Next click Edit > Insert Frames > From
File
You will see the following dialog. Click "Add File".
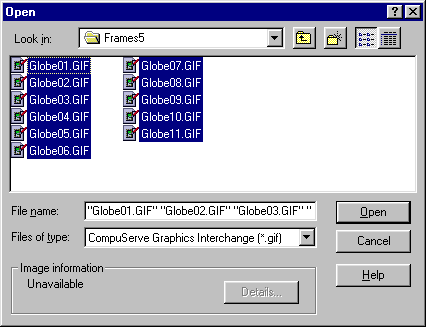
3. Drag a marquee around all the images and click the
"Open" button.

4. Load them in reverse order from their layer numbers
for the earth to be spinning in the right direction
otherwise it will be daytime in Tokyo when it should
be nighttime. Use the "Move Up" and "Move
Down" buttons to rearrange them if you have to.
Set the "Delay time" to 10 for each frame
(each frame will display for 10/100ths of a second).
When you are done, click "OK".
5. You can then view the animation to make sure it
is all right. When you are satisfied, click the save
button on the toolbar. Animation Shop will then optimize
the file. You can adjust the way the file is optimized
according to the preferences you setup.
6. Save the file as globe_11.gif.
You're done -- COOL!

|