|
|
| |
|
|
 |
| |
| |
|
Intermediate |
|
| |
|
|
Torn
Paper Effect For Web Page Backgrounds In Canvas™
6 - Part Two |
 |
|
|
|
|
|
|
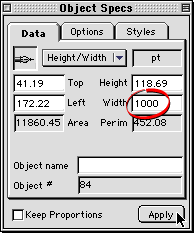
10. Enter 1000 in the width box of the Object Specs
palette (or the Transform palette - either one) to set
the width of the new rectangle. Next select both objects
and click Image > Area > Render. In the
dialog, choose a 72 ppi RGB image with a visibility
mask and no anti-aliasing. Click "OK" when
done.
 |
|
Note: I always
use RGB on working copies of images even though
the final image will be an indexed color GIF. Since
GIF images are limited to a 256 color palette, I
do it this way to make sure there is no color loss
until the final image is rendered. |
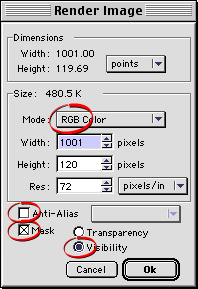
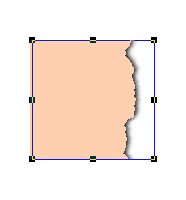
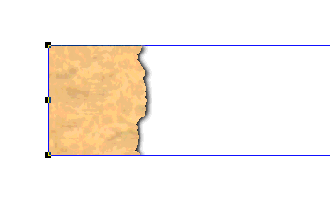
11. Below is a shot of the swatch and rectangle rendered
together as a single image.
Next we are going to add a shadow to the paper edge.
We will make a copy of the swatch object, fill it with
black, render it as a paint object then then blur it.
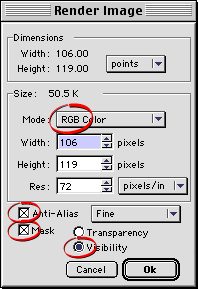
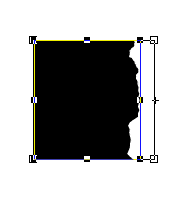
12. Select the swatch object, then click Edit >
Replicate using one copy with no offset. Give it
a black fill ink (below left). Next click Image >
Area > Render. In the dialog (below right), choose
a 72 ppi RGB image with a visibility mask and this time
choose anti-aliasing. Click "OK" when done.
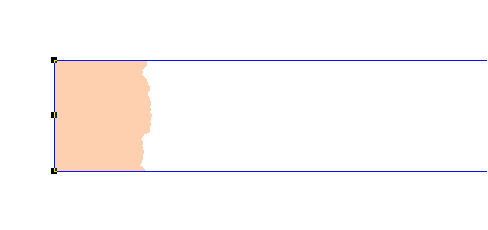
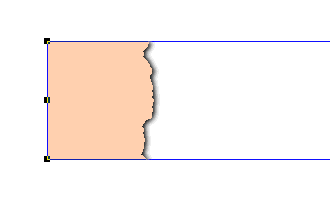
13. With the shadow object still selected Ctrl-Drag the
top, bottom and right handles to expand the image area.
We are going to apply a blur filter and we need room for
the shadow to diffuse.
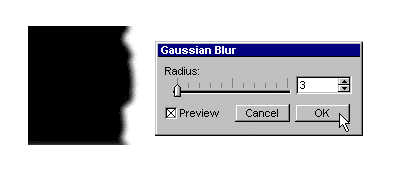
14. Click Image > Filter > Blur > Gaussian
Blur. In the dialog choose a radius of 3, then click
"OK".
 |
|
Tip:
You can reuse the original vector object over and
over again using different fills. Once the shadow
object is made, you can use it with the new fills.
You don't have to make it again. |
15. Click the "Send To Back" button  on the toolbar or click Object > Arrange > Send
To Back and position it behind the rendered swatch
and rectangle.
on the toolbar or click Object > Arrange > Send
To Back and position it behind the rendered swatch
and rectangle.
16. Next select both image objects and render them as
a single image using Image > Area > Render.
Use RGB at 72 ppi with no anti-aliasing or visibility
mask. Below is a shot of the finished background tile
ready to be exported as a GIF or JPEG. Click
here to see it used in a web page
At this point you can export
it as a GIF or JPEG image.
The example below was made using a Texture fill ink
instead of a solid color. Click
here to see it used in a web page
 |
|
|
|
|
| |
Previous
Home
Contact Mike
Related Sites
Next
Copyright
© 1998-2016 Mike Doughty, All Rights Reserved Legal
Notices
Page Last Revised: October 26, 2016
Privacy Policy
|
|
|
|
|
|
|
|