|
|
| |
|
|
 |
| |
| |
|
Intermediate |
|
| |
|
|
Canvas
6™ Technical Manual Project
Part 2C - Create The Master Pages |
 |
|
|
|
|
|
|
Return
To Technical Manual Project Index
The next phase of the master page setup is to add a
footer and some page rules on one of the master pages
then copy these new objects to the facing master page.
Before adding any objects, we either want to setup a
grid or place alignment guides on the master pages for
objects to snap to. We first need to decide how best
to do this.
Regardless of whether we use a grid or guides for page
layout, we are going to setup the grid anyway because
we can setup the alignment objects much more quickly
with the grid.
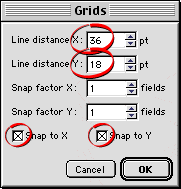
19. Start by clicking Layout > Grids. In the
dialog, enter 36 points for the x line distance and
18 points for the y line distance. Click the "Snap
to X" and "Snap to Y" check boxes, then
click "OK" when done.
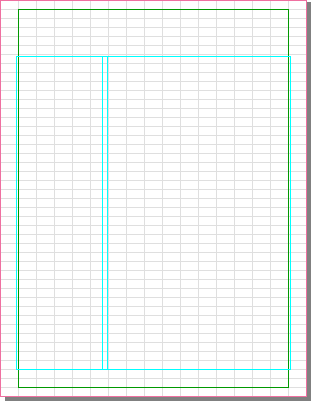
20. Next click Layout > Display > Show Grids,
then click Layout > Snap To > Grid. We
chose this particular grid configuration because it
aligns with the margins.
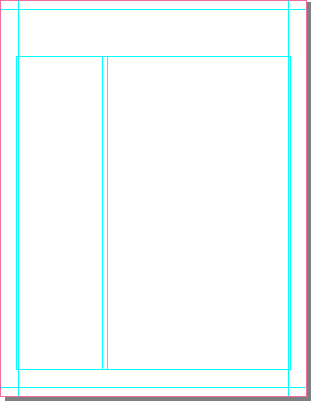
21. One alternative is to create alignment objects on
a guide layer. This is the best way to create guides
for two reasons:
a.) First, you can position the alignment objects precisely
using the Transform palette or Object Specs palette
(not even QuarkXPress™ allows positioning of guides
in this manner). When dragging alignment guides from
the rulers you can't position them with the Transform
or Object Specs palettes. Also the zoom factor affects
the position of alignment guides and you have to experiment
with it to place them exactly where you want.
b.) Second, you can either lock the individual alignment
objects, or you can lock the entire guide layer to prevent
them from being accidentally repositioned.
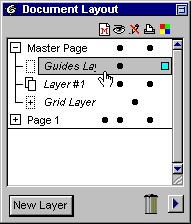
22. Following is the step-by-step procedure for creating
alignment objects on a guide layer. Using the Document
Layout palette, activate the Master Page Guides layer.
All the alignment objects will be added to this layer.
That way they will be available on every page.
 |
|
Tip: If the
document uses column guides Canvas will automatically
create a guides layer for them. Create the column
guides first, then activate the guides layer to
add the alignment objects to. If you were to create
the column guides afterwards, you would have an
extra guide layer that you may not want. |
23. First click Layout > Display > Hide Grids
then use the Line tool  and drag a vertical alignment object from the top edge
of the page to the bottom edge over the left margin. When
the grid snap is active, there is no need to constrain
the line with the Shift key.
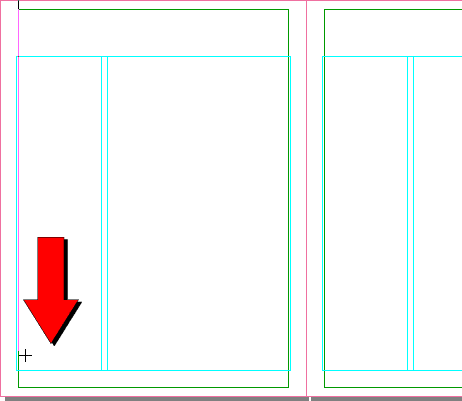
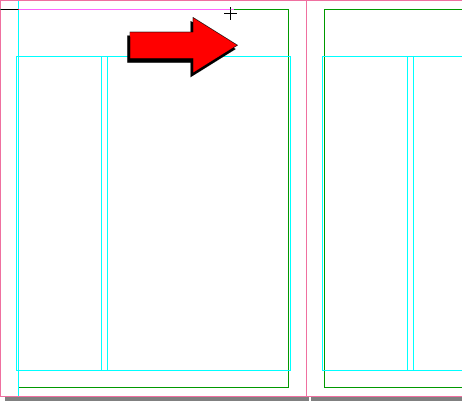
24. Next drag a horizontal alignment object from the left
edge of the page to the right edge over the top margin.
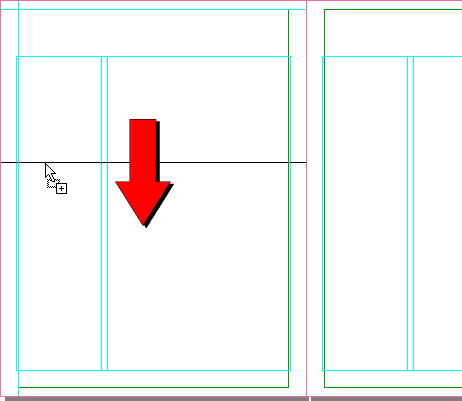
25. Select the horizontal alignment object and use Ctrl-Shift-Drag
(Windows®) or Option-Shift-Drag
(Mac®) to duplicate it. The
mouse pointer will display a plus sign indicating the
object is being duplicated. Drag it over the bottom margin
and release the mouse before releasing the modifier keys.
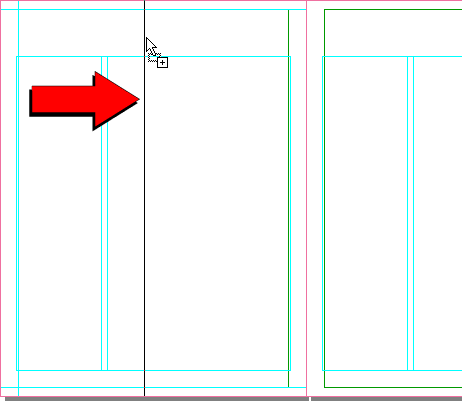
26. Similarly, Select the vertical alignment object and
use Ctrl-Shift-Drag (Windows) or Option-Shift-Drag (Mac)
to duplicate it. Drag it over the right margin.
27. Using the selection tool, marquee-select the page.
This will select all four alignment objects at once.
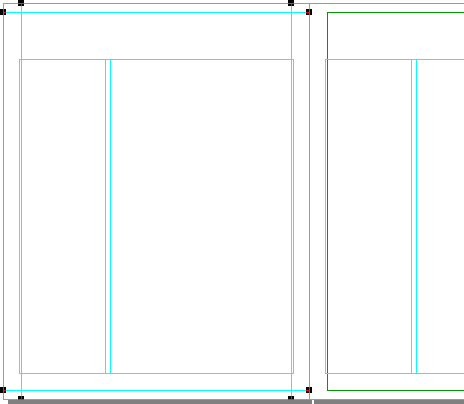
28. Use Ctrl-Shift-Drag (Windows) or Option-Shift-Drag
(Mac) to duplicate all four alignment objects and drag
them to the facing master page.
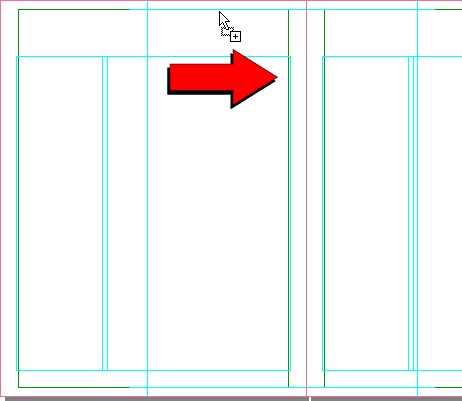
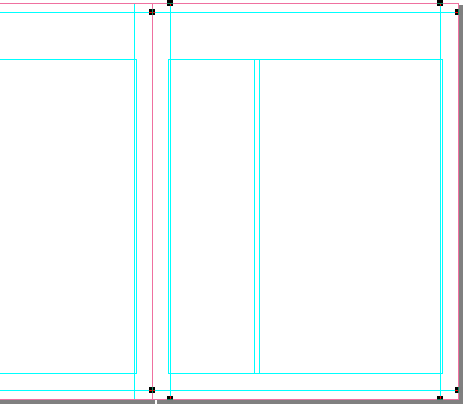
29. When you release the mouse, the alignment objects
will have been duplicated on the facing master page.
Click
Here To Continue...
|
|
 |
 |
 |
| |
Previous
Home
Contact Mike
Related Sites
Next
Copyright
© 1998-2016 Mike Doughty, All Rights Reserved Legal
Notices
Page Last Revised: October 26, 2016
Privacy Policy
|
|
|
|
|
|
|
|