|
|
Canvas™
Rollover Buttons - Part Three |
 |
|
|
|
|
|
|
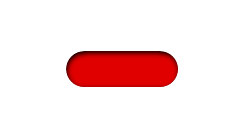
14. When you have clipped the "over" button
it should look similar to the one below.
15. You could use these vector buttons in the Web Button
palette, but I prefer to prepare them as paint objects
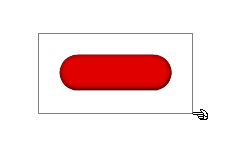
first. Start by marquee-selecting the "up"
button.
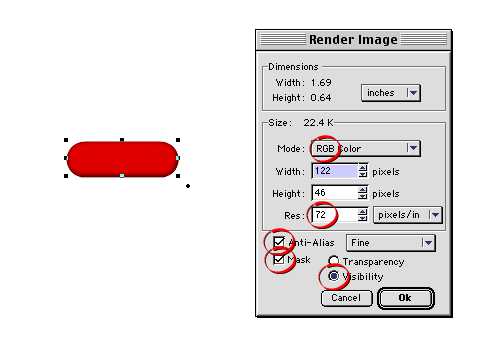
16. Next click Image > Area > Render.
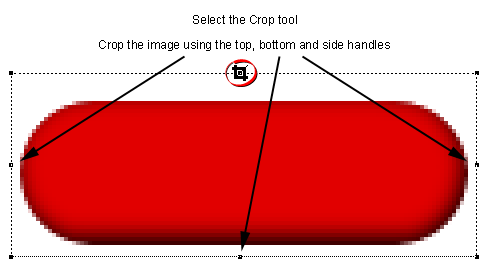
You will see the "Render Image" dialog. Choose
RGB for the "Mode" with a resolution of 72
pixels per inch (ppi) with fine anti-aliasing and a
visbility mask. Use the settings shown circled below
and click "OK" when done. Screen images are
prepared using RGB color at 72 ppi. The visibility mask
gives it a transparent background and the anti-aliasing
will give it a smooth edge.
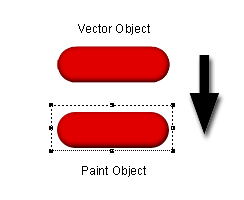
17. This will create a new paint object directly on
top of the vector original. Drag it off the vector group
so you can work on it by itself.
18. One of the reasons I like
to work with paint objects for rollover buttons is that
the sizes of the various buttons may be slightly different.
In order to make them all the same size, we need to
trim away the excess pixels with the Crop tool. Select
the Crop tool and click once on the paint object to
put it into edit mode. Drag the top, bottom and side
handles inwards to trim away the excess pixels.
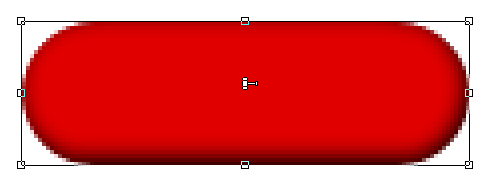
19. You will see a mouse pointer in the shape of a
gavel. When you are satisfied with the results click
once anywhere in the paint object to crop the image.
Note: This example uses a "soft
crop", which only temporarily removes the trimmed
pixels. If you accidentally trim away too many pixels,
you can restore them by using the crop tool again. Alternately
you can use a "hard crop" to permanently remove
the pixels.
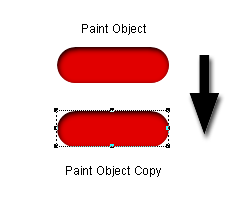
20. Repeat the previous cropping step on the "over"
button to trim away any excess pixels. When you have
done so, click on it and Opt-drag (Macintosh®)
or Alt-drag (Windows®) away
from it to create a copy of the paint object. Be sure
to release the mouse button before releasing the Opt/Alt
key.
Click
Here To Continue...
|