|
|
Canvas™
Rollover Buttons - Part One |
 |
|
|
|
|
|
|
Canvas 7 makes it very easy to create web pages with
rollover buttons. With Canvas you can easily compose
web page designs. You also can convert web page compositions
directly into HTML and graphics thus saving a lot of
development time. Canvas is my favorite composition
tool because I can work with text, bitmap and vector
objects all in one convenient application. Mainly, it
is a lot of fun to work with. The name "Canvas"
is apt because it's like a drawing or painting canvas
that allows you to compose freely without distraction.
This tutorial shows how to make a rollover button with
three states...one each for the "up", "over"
and "down" states. The button can be made
using vector objects with SpriteEffects™. The advantages
are that it is easily duplicated and remains editable
so you can adjust the effects without having to start
over. Click the above link to see the finished web page
with the rollover buttons.
1. Start by creating a new Canvas document using points
as the unit of measure. We are going to make an oval-shaped
button. Select the Rounded Rectangle tool and drag out
a shape similar to the one below.
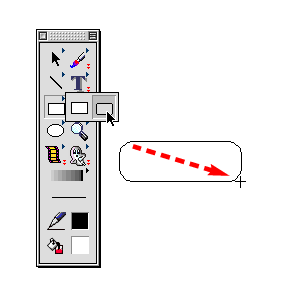
2. Next, bring up the Object Specs palette and enter
the "Height", "Width" and "Diag."
dimensions shown below (circled). The button is 36 points
high by 112 points wide, and the ends of the rounded
rectangle are semicircular in shape with a diameter
of 36 points. Note that the
height of the rectangle must be equal to the "Diag."
amount (36 points in the example below) for the ends
of the rounded rectangle to be semicircular in shape.
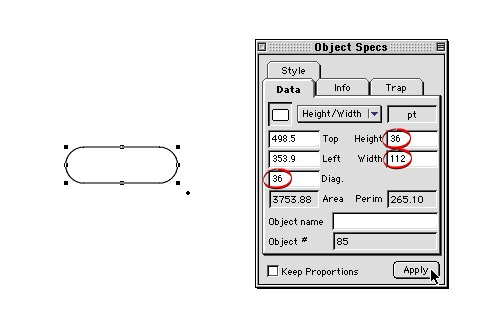
3. Bring up the Inks palette and give it a black fill.
Alternately, click the Fill icon in the Toolbox to access
the same fill inks.
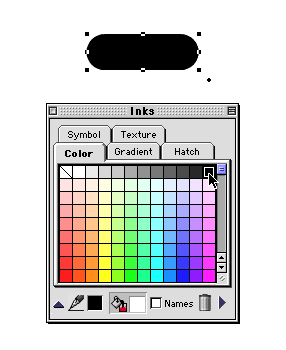
4. Click the Strokes icon in
the Toolbox and select "No Stroke".
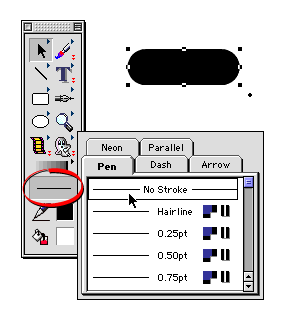
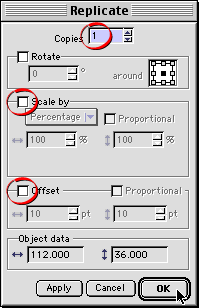
5. We need to make a copy of the rounded rectangle
and place it exactly over the original. One easy way
to do this is to click Edit > Replicate, then
in the dialog, choose one copy with no scaling or offset.
Use the settings shown circled below and click "OK"
when done.
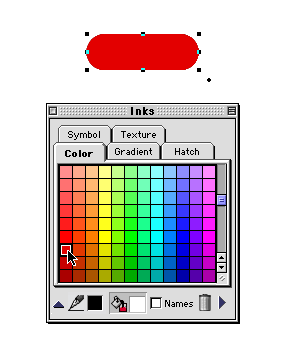
6. The copy of the first rectangle will be on top of
the stack and should be selected. Bring up the Inks
palette again and this time and give it a red fill.
Click
Here To Continue...
|