| |
|
|
Cool
Transparent Text Effect in Photoshop® Part Three |
 |
|
|
|
|
|
|
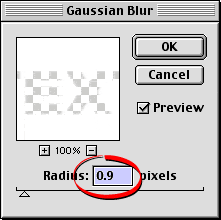
14. We are going to use this layer to create the soft
white shaded portions of the text in the lower right
corner. Even though we used anti-aliasing for the text,
it still needs to be a little softer. With the white
layer still active, click Filter > Blur > Gaussian
Blur.... In the dialog, set the blur radius to .9
pixels (circled).
 |
|
Note: Increase
the blur radius if the image resolution is greater
than 72 ppi or if the size of the type is greater
than 60 points. For example, if the image resolution
is 144 ppi, increase the blur radius to 1.8 for
60 point type. If you chose 120 point type, then
set the blur radius to 1.8 pixels for 72 ppi
or 3.6 pixels for 144 ppi. |
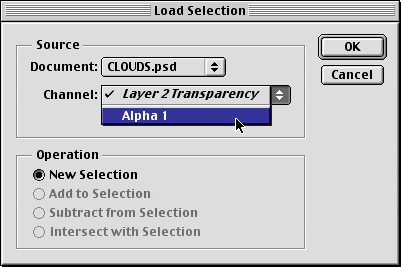
15. Next, we want to copy only the white shaded portion
of the text, so we need to load the selection that was
saved in an earlier step. Click Select > Load
Selection.... In the dialog click the "Channel:"
drop down and choose "Alpha 1" (if you didn't
give it a name when you saved it) then click "OK".
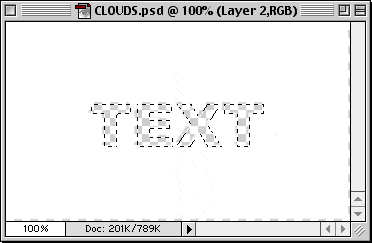
16. The selection appears on the layer as a "marching
ants" marquee in the shape of the text. When you
copy the the area enclosed by the selection you will
copy only the portion of the text that falls within
the lower right corner of the selection. Click Edit
> Copy or Cmd + C (Mac®)
/ Ctrl + C (Windows®). Then
click Edit > Paste or Cmd + V (Mac) / Ctrl
+ V (Windows). This will paste a new layer into the
file.
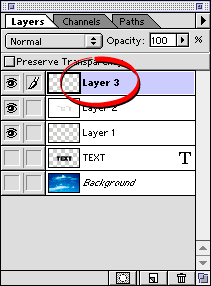
17. Shown below is the Layers palette after executing
the "Paste" command. You will see the new
layer appear just over the white layer. It is named
"Layer 3".
18. Next, we need to repeat a similar series of steps
for the black portion of the text shading. Start by
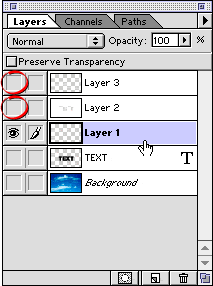
hiding the white layer and the new one just pasted (circled
below), and activate Layer 1. This was one of the two
layers created in an earlier step. We want to fill this
layer with black after loading and inverting the text-shaped
selection.
19. Click Select > Load Selection.... In the
dialog, choose "Alpha 1" from the "Channel:"
drop down as in a previous step, then click "OK".
After loading the selection, click Select > Inverse
to invert the selection. This will select everything
except for the text shape.

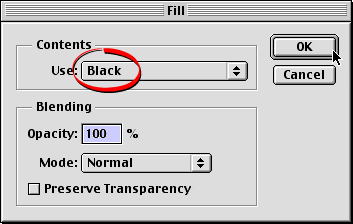
20. Click Edit > Fill, then select "Black"
from the "Use:" drop down in the Contents
section of the dialog. As before, choose 100% opacity,
Normal mode. Click "OK" when done.
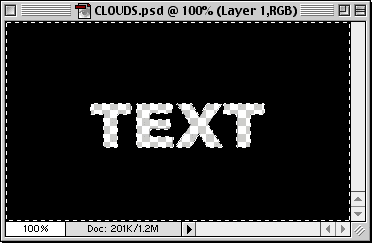
21. This is what the selection looks like when filled
with black. Deselect everything by clicking Select
> Deselect or Cmd + D (Mac) / Ctrl + D (Windows).
Click
Here To Continue...
|
|