|
|
Porting
Fonts Across Platforms:
Number 4B |
 |
|
|
|
|
|
|
Porting Mac® Type 1 Fonts To
The PC With CrossFont
To find out more about CrossFont and where to get
it, click
here
Click here
for legal note on fictitious font name used in this
tutorial
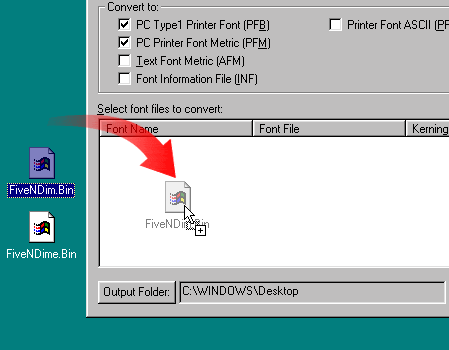
5. Drag and drop the Mac printer font file (the one
containing the font outlines) into the CrossFont window.
Click here
for more on identifying which file contains the outlines.
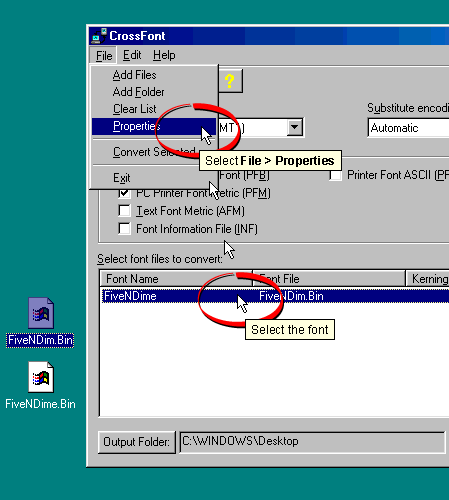
6. Now select the FiveNDime font listed
in the CrossFont window. Selecting it will highlight
it (circled below bottom). At this point we could simply
convert the font, but I deliberately skipped a step
here to illustrate a point. Instead of converting the
font now, click File > Properties (circled
below top).
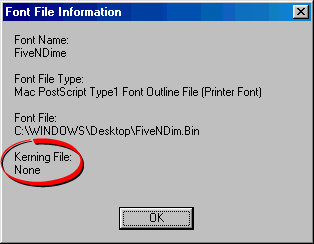
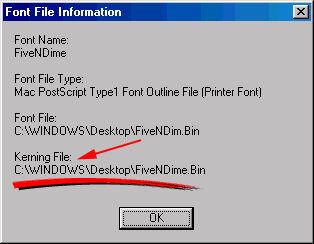
7. This brings up the Font File Information
window. What we are looking for is to see if the font
metrics were loaded when we dragged and dropped the
font outline file into the window. As you can see, the
kerning information was not loaded when we did (circled
below). CrossFont requires that you drop both the Mac
printer font and the Mac screen font into the window
in order for the kerning metrics to be included in the
conversion. Click "OK" to close the window.
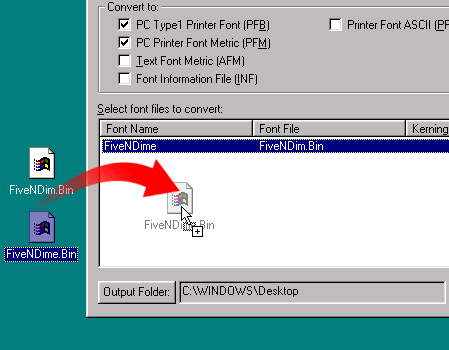
8. Now drag and drop the Mac screen font
file into the CrossFont window just like before. You
won't see any change in change in its appearance. The
"FiveNDime"font still appears.
9. Click File > Properties again
to redisplay the Font Information window. As you can
see, this time CrossFont recognizes the font metrics
in the Mac screen font and will include the kerning
information in the conversion. This is a very important
step as I explained here.
Click "OK" to close the window.
10. Okay, now we are ready to convert
the font. Both the printer font file and the screen
font file could have been dropped into the window together.
In this exercise they were only dropped into the window
individually to illustrate a point. Just remember to
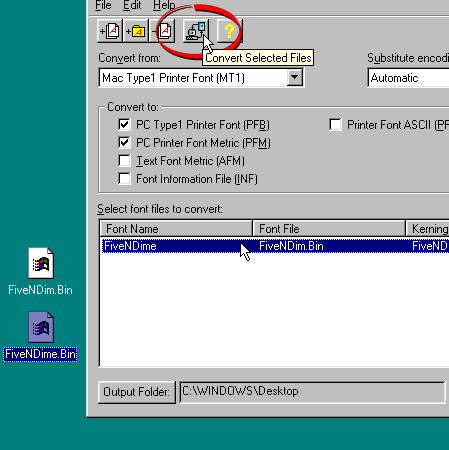
include BOTH files before converting the font. With
the FiveNDime font still selected, click the "Convert
Selected Files" button on the toolbar (circled
below).
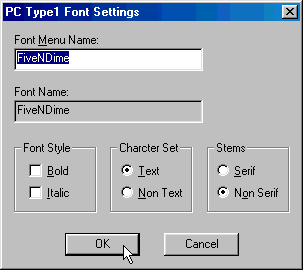
11. You will see a dialog asking you to
confirm the name that will appear on the font menus
on the PC. This is one of the important points about
font conversion (more
here). Click "OK" when done.
12. CrossFont will create two Type 1 font
files on the PC's drive. Install the font using ATM
(more here on installing
Type 1 fonts on the PC using ATM).

Click
Here To Continue...
|