|
|
Porting
Fonts Across Platforms:
Number 3B |
 |
|
|
|
|
|
|
Porting PC Type 1 Fonts To The Mac®
With CrossFont
To find out more about CrossFont and where to get
it, click
here
Click here
for legal note on fictitious font name used in this
tutorial
6. Click File > Properties again to redisplay
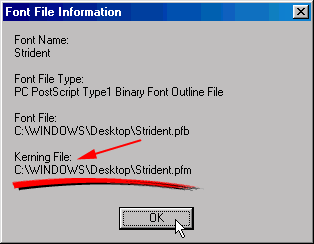
the Font Information window. As you can see, this time
CrossFont recognizes the metrics file and will include
the kerning information in the conversion. This is a
very important step as I explained here.
Click "OK" to close the window.

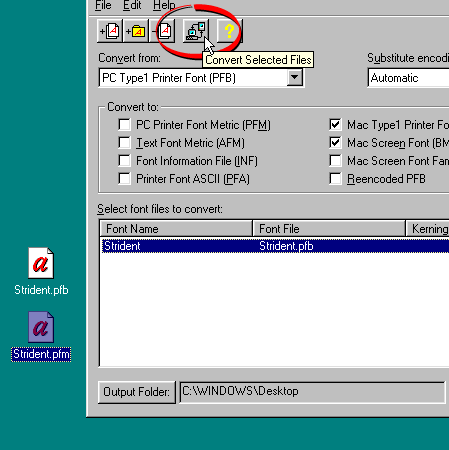
7. Okay, now we are ready to convert the
font. Both the outline file and the metrics file could
have been dropped into the window together. In this
exercise they were only dropped into the window individually
to illustrate a point. Just remember to include BOTH
files before converting the font. With the Strident
font still selected, click the "Convert Selected
Files" button on the toolbar (circled below).

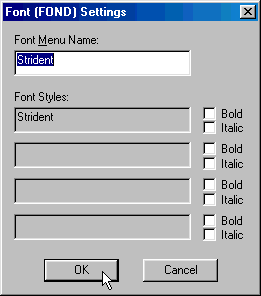
8. You will see a dialog asking you to
confirm the name that will appear on the font menus
on the Macintosh®. This is
one of the important points about font conversion (more
here). Click "OK" when done.

9. CrossFont will create two MacBinary
files on the PC's drive (more
here on the MacBinary format). Copy these files
to the Macintosh computer either by using a PC-formatted
disk or by sending them over a network (more
here on copying files between Mac and PC).

10. Next, you need to decode the MacBinary
files on the Macintosh. This step expands them into
the necessary resources required by the Mac (more
here on the Mac file system). In this case we are
using the Aladdin Stuffit Expander™ (freeware...more
details found here). Once the file is restored,
you can install the font by copying both files to the
Fonts folder in the Macintosh System folder. Remember,
when working with Type 1 fonts you have to move the
files around in pairs (more
here).

Click
Here To Continue...
|