|
|
Cool
Traveling Lens Effect In Canvas™ 7
Part Three |
 |
|
|
|
|
|
|
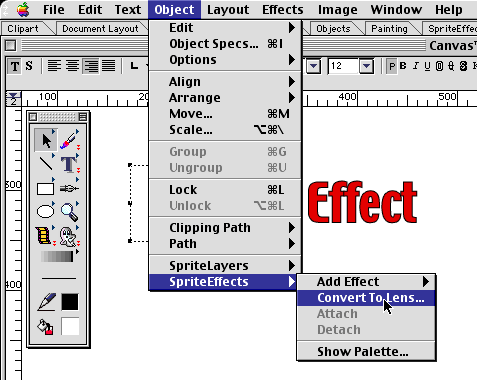
12. With the oval object still selected,
click Object > SpriteEffects > Convert To Lens....
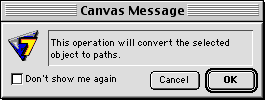
13. You will see the following message.
Just click "OK".
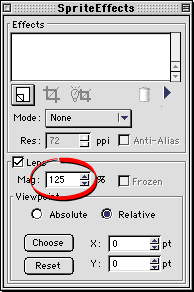
14. Bring up the SpriteEffects palette
and give the lens a magnification factor of 125% (circled
below). This will make everything under the lens appear
1 1/4th its normal size (125%).
15. Make sure the rulers are showing and
"Snap To Guides" is active. If not, click
Layout > Display > Show Rulers and Layout
> Snap To > Guides. Then create a horizontal
guide by dragging it from the ruler downwards into the
work area. Make sure the lens object is selected, then
click Edit > Copy.
16. Bring up the Object Specs palette
and make a note of its left coordinate. In this example,
it is at 160 points (circled below).

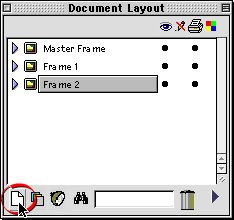
17. In the Document Layout palette, click
the icon in the lower left corner to add a new frame
(circled below). The new frame will be called "Frame
2" and it will be the active frame in the document.
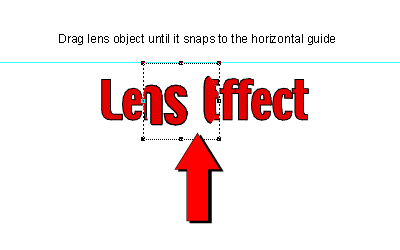
18. Click Edit > Paste to paste
a copy of the lens into Frame 2. Drag it until the top
edge snaps to the guide.
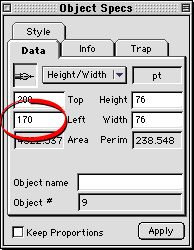
19. In the Object Specs palette, enter
a value which is 10 points more than the previous frame.
In this case, we will enter 170. Click "Apply"
when done.
20. Shown below is a view of the lens
object after repositioning it with the Object Specs
palette. You don't have to worry about the top coordinate
because we are using a guide to control the horizontal
path of the traveling lens.

Click
Here To Continue...
|