|
|
FreeHand®
Drawing Technique No. 4
Part B |
 |
|
|
|
|
|
|
10. Use the Rectangle tool and create
a new rectangle just above the first two (below left),
Release the mouse button and this new rectangle will
be selected (below right).
11. Again, using the Transform panel,
enter "-50" in the horizontal box and a zero
in the vertical box under the "Skew angles:"
section. Click "Apply" to skew the rectangle.
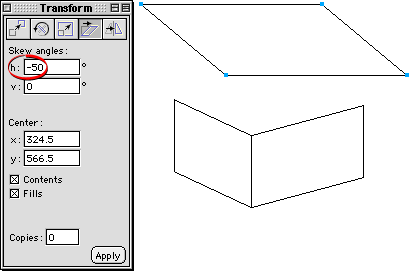
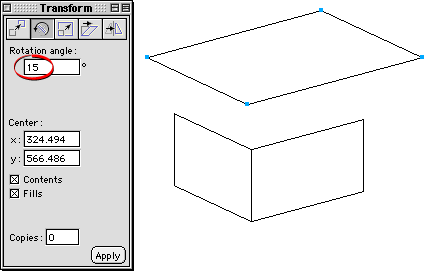
12. Press the "Rotate" button
on the Transform panel.

13. Enter "15" for the rotation
angle and click "Apply".
 |
|
Note: You
can calculate the amount of skew and rotation for
the top rectangle. The -50° of skew is the result
of 90 minus 25 (for the amount of vertical skew
on the left rectangle) minus 15 (for the amount
of vertical skew of the right rectangle). The 15°
of rotation is the same as the amount of skew on
the right rectangle. You can vary these amounts
to achieve different effects. |
14. Click away to deselect the top rectangle,
then drag it downwards by the lower corner point until
it snaps to the corner point of the first two rectangles
as shown below.
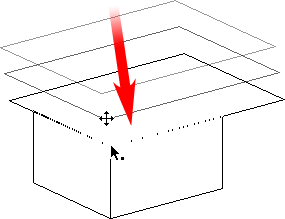
15. Position the mouse pointer over the
far right corner point of the top rectangle until you
see the small square next to the pointer.
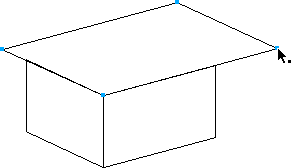
16. Click and drag this point until it
snaps to the upper right corner point of the rectangle
below.
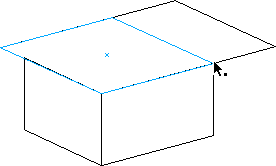
17. Position the mouse pointer over the
far left corner point of the top rectangle until you
see the small square next to the pointer.
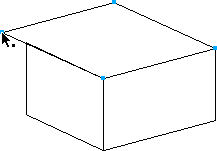
18. Click and drag this point until it
snaps to the corner point of the lower right rectangle.
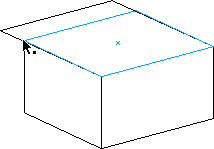
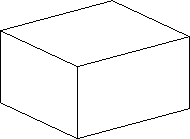
19. The box is finished. You can always
vary the angles to achieve a true isometric angle (30
degrees for the left and right rectangles) or experiment
with them for the desired effect. In the following steps,
you'll see how to use this same box as a basis for creating
a number of boxes with the same orientation.
Click
Here To Continue...
|