|
|
FreeHand®
Drawing Technique No. 4
Part A |
 |
|
|
|
|
|
|
 |
| This technique is for drawing isometric
or oblique rectangular shapes with Macromedia®
FreeHand. It is similar to Drawing
Technique Number 3, but instead of being a freeform
technique, this one uses the Transform panel to
control the angles. This tutorial was done with
FreeHand 9. |
 |
 |
| You may want to use this technique
where you have to use precision (like in technical
illustration). Another reason to use this technique
over the previous tutorial is where you need to
make a number of boxes or rectangles with the same
orientation. All the shapes can be resized while
maintaining their angles. You can simply copy them
and reuse them without having to transform them
individually. I'll provide examples of this at the
end of the tutorial |
 |
1. Create a new document and click View
> Snap To Point. This setting plays an important
role in this technique. Next, select the Rectangle tool
in the Toolbox.

2. Draw a rectangle in the workspace.
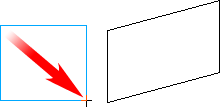
3. Click Window > Panels > Transform
to bring up the Transform panel. Click the "Skew"
button (below left) then enter "15" in the
box with a "v:" next to it under "Skew
angles:". The "V" is for "vertical".
Click "Apply" to apply to transform the rectangle
(below right).
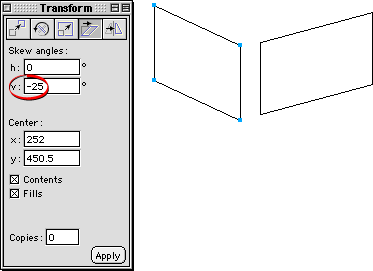
4. Select the Rectangle tool again and
draw another rectangle to the left of the first one
similar to the example below.
 
5. Use the Transform panel to give this
rectangle a vertical skew of minus 25 degrees. Click
"Apply" to transform the rectangle.

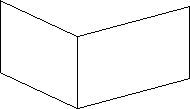
6. Position the mouse pointer near the
lower right corner of the left rectangle. When you see
a small solid square next to the pointer, press and
hold the mouse button down then drag the object until
it snaps to the lower left corner point of the rectangle
on the right.
7. Position the mouse pointer over the
upper left corner point of the left triangle (below
left). When you see the pointer with the solid square
next to it, click and drag this corner point to adjust
the rectangle to the desired width (below right).
8. Once the desired width is attained,
position the mouse pointer over the opposite point (below
left). Click and drag this point downwards until it
snaps to the corner point of the rectangle on the right
(below right).
9. Two of the rectangles are now complete.
Next, you'll be adding the top rectangle.

Click
Here To Continue...
|