|
|
Cool
Type Effect With Canvas™ 7
Part Four |
 |
|
|
|
|
|
|
17. The type looks fine. For a finishing touch we can
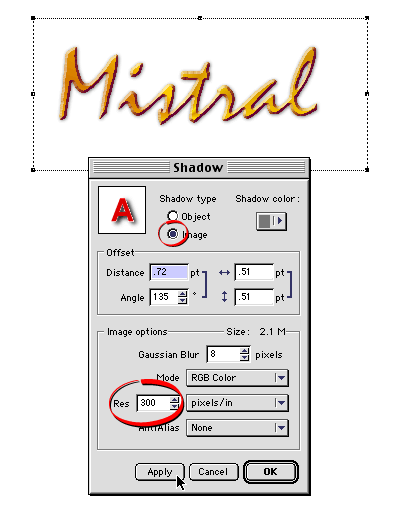
add a soft shadow. Canvas has a built-in effect for
this. Click Effects > Shadow... and use the
settings shown in the dialog,below. The two most important
things are that the shadow type is an image and that
the resolution is 300 ppi (circled below) because we
want a high resolution image for print. When you click
"Apply" (below), Canvas creates a new shadow
paint object underneath the text object.

18. At this point our effect is complete. We can use
it several different ways. First we'll render the effect
as a bitmap. This is the simplest use of the effect.
The rendered bitmap can be saved in any bitmap format
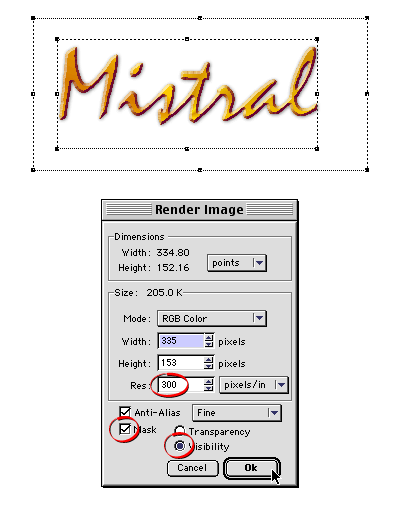
and exported to any graphics application. Select both
the shadow paint object and the text object and click
Image > Area > Render. In the dialog, enter
300 for the resolution, and give it a visibility mask
and choose fine anti-aliasing. The visibility mask is
to give the rendered image a transparent background.
Click "OK" when done.

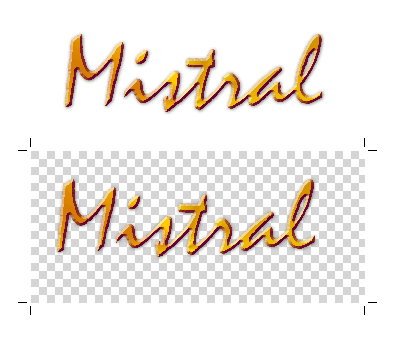
19. In the screen shot below, I dragged the rendered
bitmap off the text object and placed it below it. Then
I put it into edit mode so you can see the checkerboard
pattern indicating transparent background pixels. The
visibility mask setting in the "Render Image"
dialog is what creates the transparent background.

Click
Here To Continue...
|