|
|
Cool
Type Effect With Canvas™ 7
Part Two |
 |
|
|
|
|
|
|
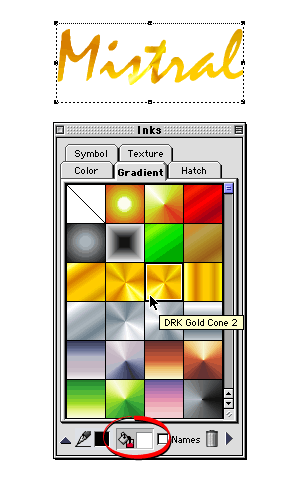
9. Bring up the Inks palette (or click the text color
drop down arrow on the Text Ruler). Select the "Gradient"
tab. In the Inks palette, make sure the Fill button
is selected (circled below) and click the "DRK
Gold Cone 2" gradient. Note:
Colors used in this effect are out-of-gamut. If this
type effect will be used in print, you will need to
use the CMYK color space and correct the out-of-gamut
colors.

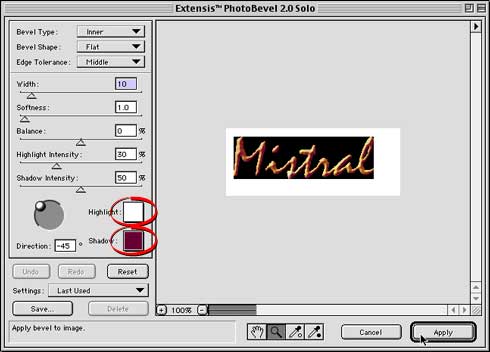
10. Next, click Object > SpriteEffects > Add
Effect > Extensis®
> PhotoBevel 2.0 Solo. You will see a dialog
similar to the one shown. The highlight and shadow colors
are circled below. Choose "Inner" for the
bevel type and "Flat" for the shape. Use the
remaining settings shown below: Click "Apply"
when done.

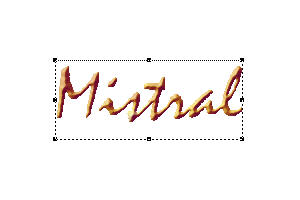
11. This is the result of the bevel effect. At this
point, you can use it as-is or vary its appearance by
making changes either to the object or to the effect.
The bevel width was set to 10 pixels which occupies
all of the beveled portion of the type as well as some
of its surface. Let's give the text a more flat appearance.
There are a few ways to do this. Either modify the bevel
width in the PhotoBevel plug-in or change the resolution
of the finished effect in the SpriteEffects palette
or increase the point size of the type. Since this effect
will be exported and used in a print layout, we will
increase the resolution to 300 ppi.

12. Bring up the SpriteEffects™ palette. In this
case the default resolution is 72 ppi (below left).
Change it to 300 ppi (below right).
Click
Here To Continue...
|