|
|
Canvas™
Rollover Buttons - Part Four |
 |
|
|
|
|
|
|
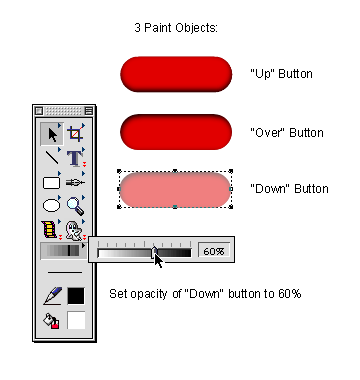
21. While this copy is still selected, bring up the
opacity slider in the Toolbox and adjust the opacity
of the copy to 60%. This copy will be the "down"
button.
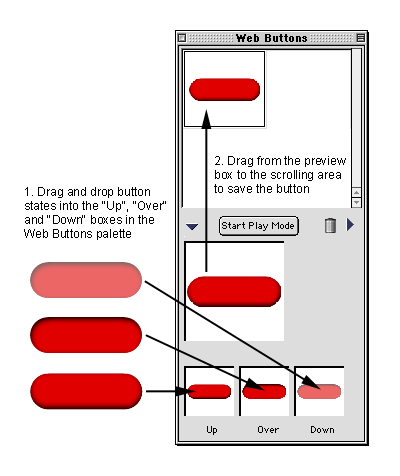
22. Double-click the Web Button tool in the Toolbox
to bring up the Web Button palette. Drag and drop the
paint objects into their respective "Up",
"Over" and "Down" boxes in the palette
as shown in the example below. You will then see the
button in the preview box in the middle of the palette
which you can test with the mouse. When you are satisfied
with the results, drag the button from the preview box
into the scrolling area at the top of the palette to
save the button.
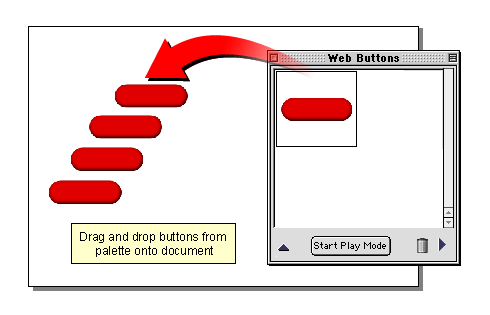
23. Make a new 600 x 400 Presentation
document and drag and drop buttons from the palette
into the document. This is what's really cool about
Canvas. You just lay them out and it will create all
the HTML and graphics.
 |
|
Tip:
Drag and drop only one button into the document
from the palette, then copy and paste this button
to avoid creating more than one instance of the
button in the document. |
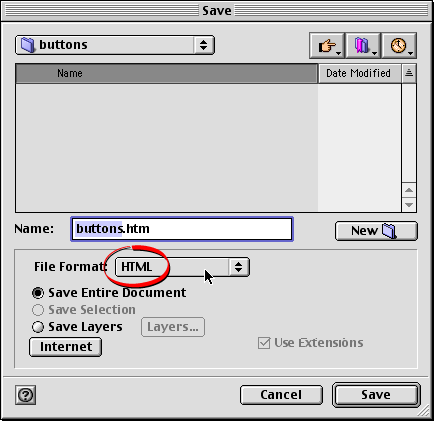
24. Save this new document as a Canvas document first,
then click File > Save As and choose "HTML"
from the "File Format" drop down.
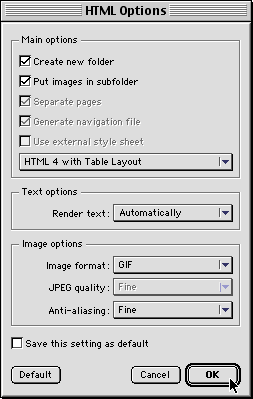
25. You will see the "HTML Options" dialog.
For this example, choose "GIF" as the Image
format and use the settings in the example below for
the web page and images. Click "OK" when done.
Click
here to see the finished web page with rollover buttons.
|