|
|
Wha's
UUUp! Type Effect With Canvas™ 7
Part Five |
 |
|
|
|
|
|
|
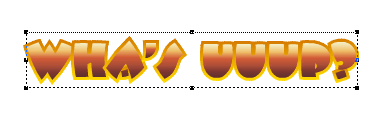
16. Deselect everything to check your work. The text
should look like the example shown below.

17. Next, we are going to add a SpriteEffect™.
Select the text object with the Selection tool.
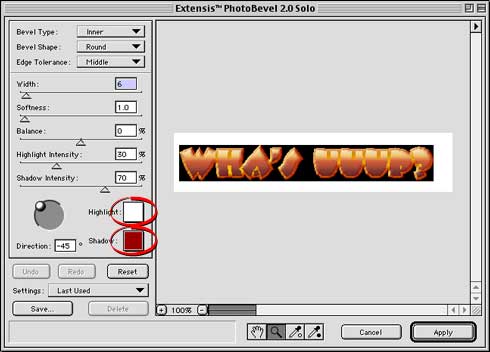
18. Next, click Object > SpriteEffects > Add
Effect > Extensis®
> PhotoBevel 2.0 Solo. You will see a dialog
similar to the one shown below. The highlight and shadow
colors are circled. Choose "Inner" for the
bevel type and "Round" for the shape. Use
the remaining settings shown below: Click "Apply"
when done.
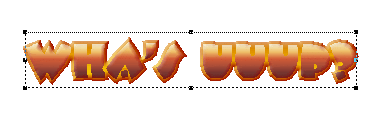
19. If the default resolution for the SpriteEffect
is 72 ppi, the result should look like the example below.
The edges are a bit spiky, so we can fix that by using
anti-aliasing and increasing the resolution of the effect
(without changing the text object).
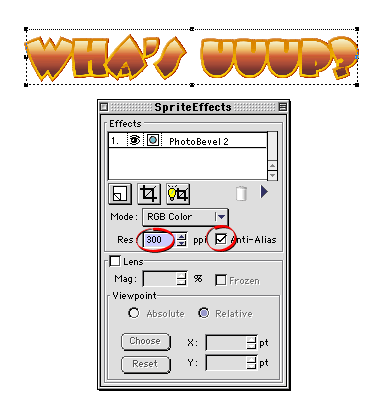
20. Bring up the SpriteEffects palette and change the
resolution to 300 ppi and click the "Anti-Alias"
checkbox. These settings will help to smooth out the
edges. This resolution is best for printed output, but
you can re-render it back to 72 ppi and still have smooth
edges. Once the effect is complete I will show you how...
Click
Here To Continue...
|