| |
Using OpenType® Fonts With Adobe® InDesign®
|
 |
|
|
|
|
|
|
Adobe InDesign provides support for OpenType fonts.
This tutorial was prepared using Adobe Warnock Pro
Regular with InDesign CS (InDesign version 3). First
place your document in text editing mode then select
the font with the Character palette. At this point
there are a couple of ways to go about applying OpenType
extended features to text.
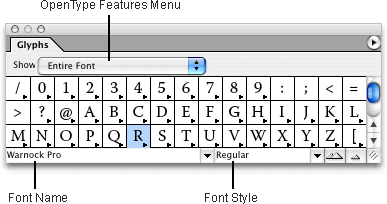
1. The first and easiest method is to use the Glyphs
palette. Click Type > Glyphs to access the
Glyphs palette. The font name is displayed in the lower
right corner of the palette and the font style is displayed
to the right of the font name. You can show the various
special features of the selected font with the drop-down
menu.

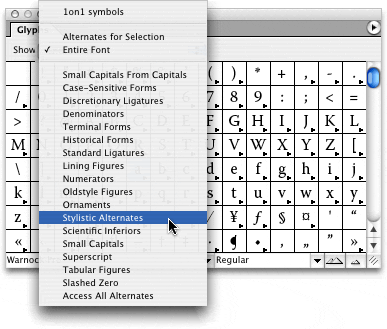
2. Click the drop-down menu to select any of the various
special features of the font. You can also select the
entire font in the menu.

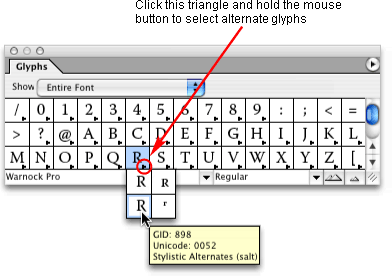
3. The Glyphs palette displays all the glyphs of the
selected feature of the font. Look for glyphs with
a small triangle in the lower right corner of the glyph.
Click and hold the mouse down on the triangle to access
alternate glyphs for that character. Then move the
mouse pointer over the desired glyph and release the
mouse button. If you do this while editing text, the
character will be pasted into your document at the
insertion point when you release the mouse button.

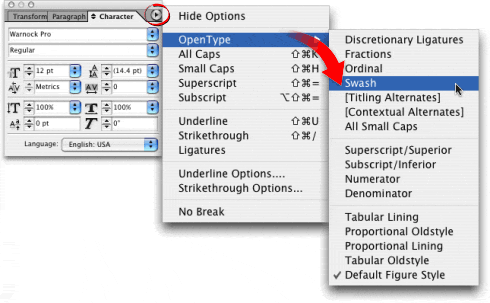
4. Another way to access most of the special features
of the font is to use the Character palette. First,
select the text that you wish to apply a special OpenType
feature. Click the small triangle in the upper right
corner of the palette to access the Character palette
options menu. While holding the mouse down, choose "OpenType" from
the menu. A sub menu of OpenType options will appear.
Move the mouse over the desired feature, then release
the mouse button.

|