|
|
Halo
Text Effect in Photoshop®
Part Two |
 |
|
|
|
|
|
|
6. Next click Select > Feather. Enter an
amount for the feather radius. In this case I chose
to feather the selection 5 pixels. Click "OK"
when done.
7. We want to use this selection on Layer 1 so click
this layer in the Layers palette to activate it.
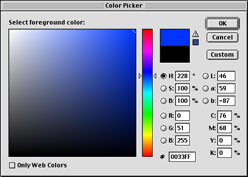
8. Click the foreground color selection box in the
Toolbox (below left). This will activate the Color Picker
(below center). Pick a color and click "OK"
to close the dialog. In this case I picked a blue color.
The foreground color selection box will now display
the new foreground color (below right).
9. Next, click Edit > Fill and choose "Foreground
Color" in the dialog. Click "OK" when
done.
10. You can see the effect of the fill in the document
window (below left) and as a finished image (below right).
|