|
|
A
Rainbow of Illustrator® 9 Gel Buttons
Part 1B |
 |
|
|
|
|
|
|
9. With the Rounded Rectangle Tool position
the mouse pointer approximately in the position shown
below (the cross hairs pointer) and click once.

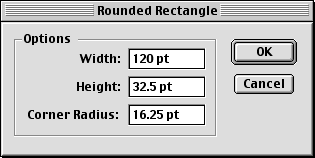
10. Enter the specifications shown in
the screen shot below for the third object. We want
this rounded rectangle to be 120 points wide by 32.5
points high with a corner radius of 16.25 points. Click
"OK" when done.
11. You will see "Object 3"
appear approximately in the position shown below. When
you click away with the Selection Tool to deselect all
objects, your screen should look similar to the example
below right.
12. We need to make one more rounded rectangle.
Again, with the Rounded Rectangle Tool, position the
mouse pointer approximately in the position shown below
and click once.

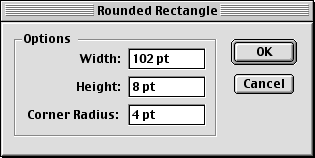
13. Enter the specifications shown in
the following screen shot. This rounded rectangle is
102 points wide by 8 points high with a corner radius
of 4 points. Click "OK" when done.
14. You will see "Object 4"
appear approximately in the position shown below. When
you click away with the Selection Tool to deselect all
objects, your screen should look similar to the example
below right. All of the objects are made, so now we
need to position them precisely.
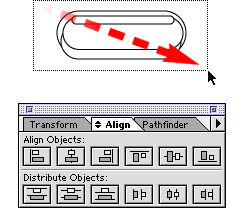
15. You can align them horizontally all
at once with the Align palette. Marquee-select all four
objects.
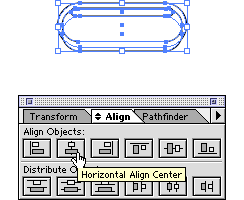
16. Then click the "Horizontal Align
Center" button in the Align palette. It's done!
17. Yours should look similar to the example
below. Next we'll adjust the vertical position of each
object with the Transform palette.

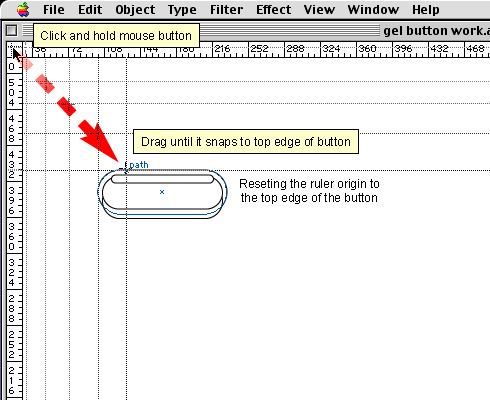
18. To make it easier to make the vertical
adjustments, we'll need to reset the ruler origin to
the top edge of the button. Then we can adjust the vertical
position of the remaining objects relative to this object.
The top edge of the bottom object is also the top edge
of the the button. First, we need to enable Smart Guides
so click View > Smart Guides. Position the mouse
pointer in the upper left corner where the rulers intersect
then click and hold the mouse button. Drag it downwards
until it snaps to the top edge of the bottom object
then release the mouse button. Smart Guides will tell
you when the ruler origin is properly aligned with the
top edge of the the button by displaying the word, "path"
in a light blue color.
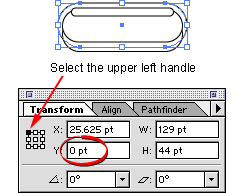
19. In the Transform palette select the
upper left handle in the square that represents the
object's bounding box. If you select the bottom object
you will see that its y-coordinate is now zero.
Click
Here To Continue...
|