Guess what? We're going to change the top and bottom
margins. I put this in the tutorial because you are
probably going to do this in the real world. You are
going to make changes as you go because this is a creative
endeavor.
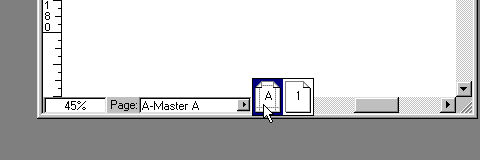
10. Make sure the master pages are displayed. If not
click the "A-Master A" icon in the Document
palette. You can also click Page > Display >
A-Master A. Another fast way to switch between document
and master pages is by using the Go-To-Page pop-up menu
located in the lower left corner of the document window:
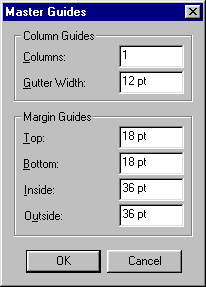
11. Next click Page > Master Guides...
to bring up the Master guides dialog. This is the dialog
used to modify the margins of your document. The menu
selection is grayed out if the document is displayed.
You can only access it if a master page is displayed.
Enter 18 points for the top and bottom margins and click
"OK".
12. Remember the dialog when you first created the document
(accessed by clicking File > New > Document).
There is no other dialog in Quark™ like that first
one where you can make changes to your document.
You might wonder how to change the page size and orientation.
We aren't going to make any changes, but to do so you
must first display a document page. Next click File
> Document Setup to gain access to the Document
Setup dialog (below). The menu selection is grayed out
if a master page is displayed. You can only access it
if a document page is displayed. This is exactly the
opposite of how to access the Master Guides dialog as
in step 2. The whole point of this is to knowing how
to control all aspects of creating documents.
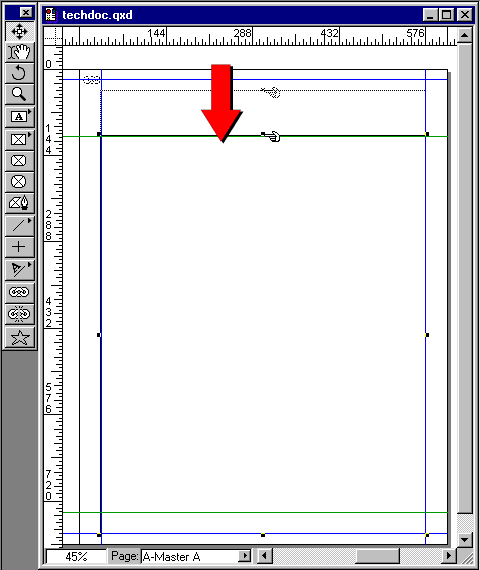
13. Okay, so with the master page "A-Master A"
being displayed, we are going to reshape the main text
boxes into something that's easier to read than one
column that takes up all the available space. We are
going to setup the layout using a "one-third/two-thirds"
format.
First make sure "Snap to Guides" is turned
on. Click View > Snap to Guides. Using either
the Content tool
or the Item tool
select the main text box and place the mouse on the
top center handle. Click and drag downwards until the
top edge of the text box snaps to the top page guide.
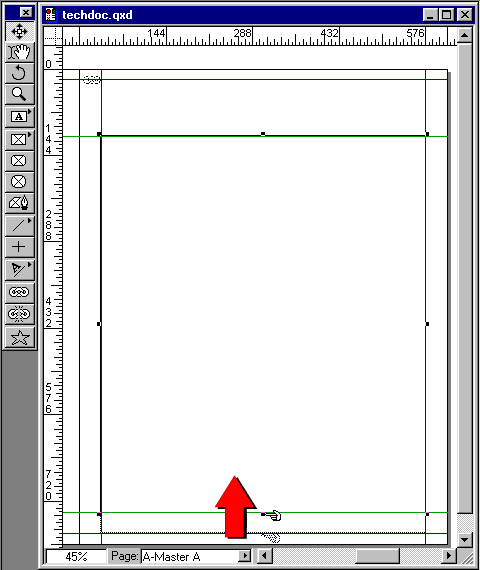
14. Similarly, drag the bottom edge of the text box
upwards until it snaps to the bottom page guide.
15. Next set the width of the text box. Make sure the
Measurements palette is displayed and enter 360 points
in the width field:
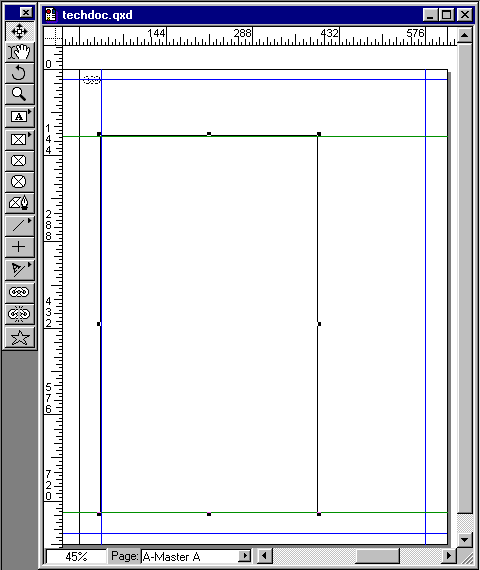
16. The text box (still selected) should now resemble
the image below: