|
|
Spinning
Globe Tutorial
Part Two - Making The Globe Frames |
 |
|
|
|
|
|
|
1. Next you will add the blue globe to the transparent
background of Globe.PSD. Choose the elliptical selection
tool  .
In the options palette choose "Fixed Size"
as the style with a width of 48 and a height of 48 pixels.
Make sure "Feather" is set to zero and the
"Anti-aliased" box is checked. Click the mouse
just inside the upper left corner of the image. Save
the selection either by clicking the "Save Selection
as a Channel" button in the channels palette or
by the command: .
In the options palette choose "Fixed Size"
as the style with a width of 48 and a height of 48 pixels.
Make sure "Feather" is set to zero and the
"Anti-aliased" box is checked. Click the mouse
just inside the upper left corner of the image. Save
the selection either by clicking the "Save Selection
as a Channel" button in the channels palette or
by the command:
Select > Save Selection...
You will use this selection to edit the individual map
layers.
2. Set the foreground and background colors to the following
RGB values:
Foreground: R=0 G=255 B=255 (cyan)
Background: R=0 G=65 B=97 (dark blue)
3. Using the gradient fill tool  and the default midpoint of 50% between the two colors,
in the options palette set the mode to "Normal",
the gradient to "Foreground to Background"
and the type to "Radial". Make sure the "Mask"
and "Dither" boxes are not checked. Click
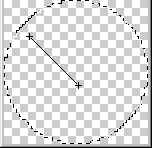
near the upper right edge of the selection and drag
the mouse from top left towards the bottom right using
the image below as a guide, then release the mouse button:
 |
 |
4. If you're lucky you'll have an image much like the
one below. If not, you can press Cmd+Z / Ctrl+Z to undo,
then try it again:
5. Opt-Click / Alt-click on far left square in the
layers palette next to Layer 1. That will make the little
eye icon appear in the square indicating you are making
Layer 1 visible.
6. Click the following command:
Filter > Distort > Spherize
Set the mode to "Normal" and the amount to
100%.
Your first layer in Globe.PSD should look like the following:
7. Set the layer mode to "Multiply". This
will apply the shading of the globe to the newly pasted
layers giving them depth and shape:
8. Hide Layer 1 and make Layer 2 the visible layer
by Opt/Alt-clicking on the little square on the far
left of the layer. Press Ctrl-F to repeat the distort
filter, then set the layer mode to "Multiply".
Repeat this step for the Layers 3 through 11:
9. You will now export each layer with the globe background
as individual GIF files. As you do this you will trim
away any excess pixels in the layers so each frame will
be perfectly round. First restore the default black
foreground and white background colors by clicking on
the little black and white squares in the tool palette
next to where the foreground and background colors are
displayed. Press Sift-Ctrl "I" or click the
command:
Select > Inverse
Then press the delete key. This will make a perfect
circular selection for export:
To export each frame as a GIF file use the command:
File > Export > GIF89a Export
Set the palette option to "Adaptive" and the
colors to 256 in the export dialog box. You can save
the layers as Globe01.GIF, Globe02.GIF, Globe03.GIF,
etc.
10. Repeat step 9 for each layer making sure that only
one layer plus the background is visible at a time.
 |
|
Note: Photoshop®
version 5.5 includes Adobe® ImageReady®
which provides a much faster way to animate the
frames. There is no need to export each frame as
individual GIF files with ImageReady. The following
steps are included for those who don't have ImageReady
or other software that will make an animated GIF
directly from layers. |
Click
Here To Continue...
|