|
|
Quick
and Easy Gel Buttons in Canvas™ 7
Part Ten |
 |
|
|
|
|
|
|
Creating Grayscale Versions of The
Gel Button
It is very easy to make grayscale versions
of the buttons. Simply take each master button, then
select Objects 1, 2 and 4 and, in turn, switch from
"HSL" to "Grayscale" using the Color
manager in the Inks palette. Below are the step-by-step
instructions.
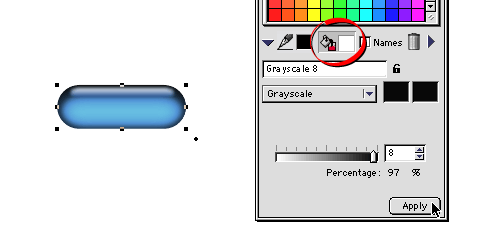
36. Using the gel button master number
2 (the aqua one), select the bottom object ("Object
1") as in a previous step, then bring up the Inks
palette. Switch from "HSL Wheel" (or "HSL
Bars") to "Grayscale. Make sure the Fill icon
is depressed, then click the "Apply" button.

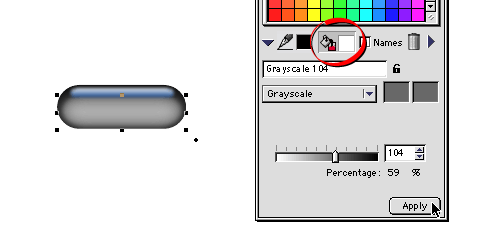
37. Next, select Object 2 as in a previous
step. Again, in the Color manager of the Inks palette,
switch from "HSL Wheel" (or "HSL Bars")
to "Grayscale. Make sure the Fill icon is depressed,
then click the "Apply" button.

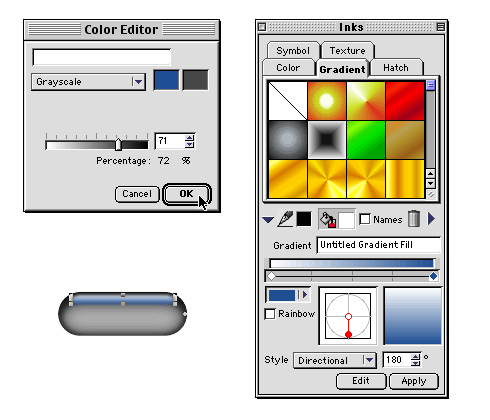
38. Finally, select "Object 4",
and display the Gradient manager. In a manner similar
to a previous step, select the second color of the gradient
and change it to Grayscale, then click "OK"
in the Color Editor.

Click
Here To Continue...
|