|
|
More
On Halftones:
Process Color Halftones And Line Art |
 |
|
|
|
|
|
|
How does the printer or imagesetter create a halftone
from a color or grayscale image? The printer creates
halftone dots by means of a halftone cell (below). A
halftone cell is composed of a grid of pixels. Each
pixel would be either solid black or solid white. The
number of shades of gray which can be represented by
a finished halftone image is limited by the number of
pixels available in the halftone cell. Below is an example
of a 16 x 16 halftone cell.
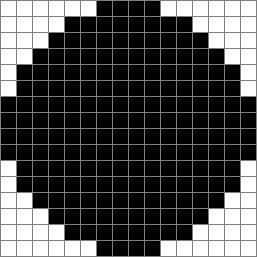
In the example above there are 16 x 16 = 256 possible
shades of gray. If all the pixels were black the halftone
dot would be 100% black. If all the pixels were white
the halftone dot would be 0% black. If every other pixel
were black, the halftone dot would be 50% black, etc.
In the above diagram, there are 188 black pixels out
of a possible 256 in the halftone cell. The dot would
have a grayscale value of 73.4% black.
There is a formula for calculating
the maximum screen frequency a printer can output:

Thus, for a 1200 DPI Linotronic imagesetter, the maximum
screen frequency for 256 shades of gray would be 75
and the maximum screen frequency for 64 shades of gray
would be 150.
In actuality, though, one can get away with as few as
32 shades of gray in most any image. Thus, for a 150
line screen halftone, you can reduce the number of grays
in your images to 64 or less to achieve satisfactory
output on a 1200 DPI machine.
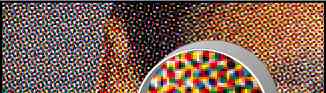
Process Color Halftones
Both color and grayscale halftone dots are created
as shades of gray. "What?", you say. "Color
halftones are shades of gray?" You see, even though
the halftone will print using process color, each of
the four color plates (cyan, magenta, yellow and black)
is prepared from a black and white halftone negative.
When printed and combined with their corresponding color,
the result would be a color picture (below).
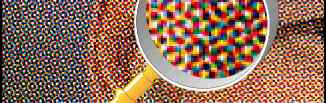
Halftone Angle or "Slope"
Part of setting up the halftone in page layout is determining
its angle or "slope". If the halftone were
to be displayed with a slope of 0° it would be hard
on the eyes. For this reason halftone dots are placed
at an angle to each other to blend in better. The dots
on a simple grayscale halftone need only be angled at
45°. But the dots on a process color halftone need
to be offset from each other in a pattern so they appear
harmonious. If you will notice in the representative
image above, the cyan, magenta, yellow and black dots
appear to form a circular group called a "rosette".
The default angles vary with the separation printer
selected for output. The default angles for cyan, magenta,
yellow and black for a Linotronic 330 are:
| Cyan |
15° |
| Magenta |
75° |
| Yellow |
0° |
| Black |
45° |
Line Art Resolution Rule of Thumb
In the previous tutorial a rule of thumb was given
for determining the resolution of a grayscale or color
image. It is always better to use an EPS vector image
for line art. However, if a bitmap must be used, the
rule of thumb for line art is to scan or size it to
600 PPI to avoid the "jaggies". Line art bitmaps
have to be scanned or sized at a much higher resolution
than color or grayscale halftones.
Click
Here To Continue...
|