|
|
A
Rainbow of Illustrator® 9 Gel Buttons
Part 1F |
 |
|
|
|
|
|
|
38. With "Object 3" still selected,
bring up the Transparency palette. First select a Blending
Mode of "Overlay" from the pull-down on the
left (shown below left). Then adjust the opacity slider
to 70% (below right).
39. It's coming along. Just a few more
steps to go.

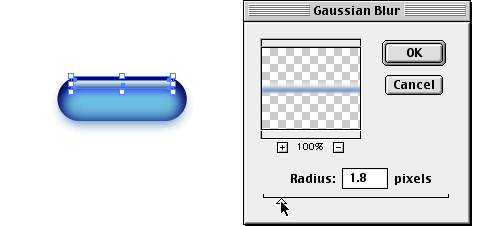
40. Finally, select "Object 4"
at the top of the stack. Once again, click Effect
> Blur > Gaussian Blur and enter a radius
of 1.8 pixels. Click "OK" when done.

41. The button is almost complete. We
want to clip the objects to give the button a clean
edge.

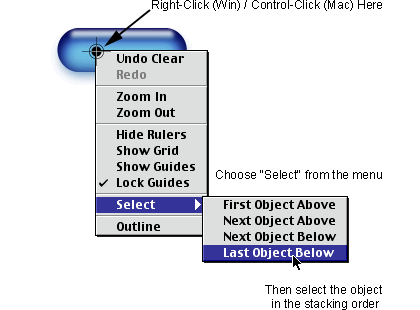
42. We want to use a copy of the bottom
object for the clipping path (clipping mask. The terms
are interchangeable). To select the bottom object from
the stack, position the mouse pointer over the button
and Control+Click (Macintosh®)
or Right-Click (Windows®).
This brings up a context menu. Choose "Select"
from the menu and select "Last Object Below".

43. With the bottom object selected, press
Edit > Copy followed by Edit > Paste
In Front. This will paste an exact duplicate of
the bottom object directly in from of it. We want it
at the top of the stack to make a clipping path. While
this new copy is still selected, click Object >
Arrange > Bring To Front. The appearance of your
artboard should look like the example below.

44. Marquee-select the entire stack of
objects.

45. Click Object > Clipping Mask
> Make. The master button is now finished. At
this point you can make an image of the button to use
it in a web page. You also can copy it and change just
3 colors to create a completely new button. This is
a lot easier than recreating it from scratch when using
an image editor to make the button.

Click
Here To Continue...
|