|
|
| |
|
|
 |
| |
| |
|
Intermediate |
|
| |
|
|
Wha's
UUUp! Type Effect With Canvas™ 7
Part Four |
 |
|
|
|
|
|
|
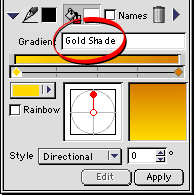
13. You can name this new gradient if you want by entering
its name in the text box. In this example the name is
"Gold Shade". It isn't necessary to name the
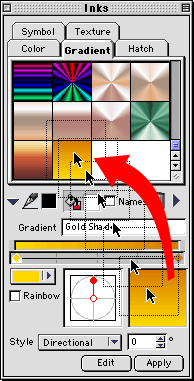
gradient. Save this gradient by dragging it from the
preview box into the preset area in the Inks palette
(below right).
Enter "Gold Shade"
in the text box (circled) to give the new gradient
a name.
 |
|
 |
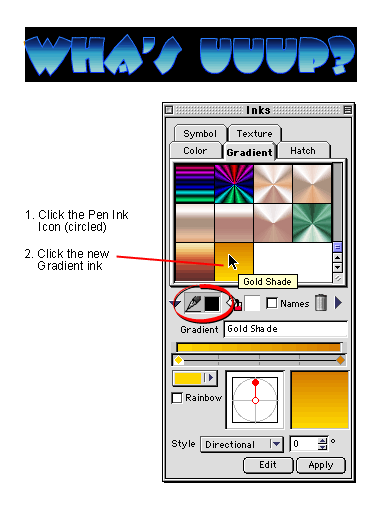
14. If the text isn't still selected, use the Text
tool to select it. Then click the Pen icon (circled,
below) and click the new gradient ink saved in the previous
step. In this case, the default pen width is 1 point.

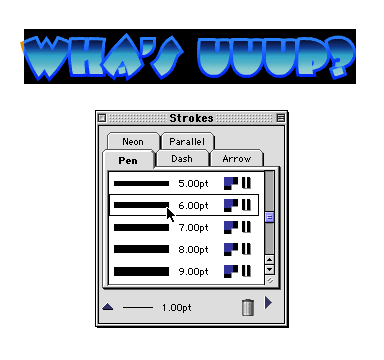
15. We want the pen width to be 6 points. Bring up
the Strokes palette and choose the 6 point preset from
the "Pen" tab.

Click
Here To Continue...
|
|
 |
 |
 |
| |
Previous
Home
Contact Mike
Related Sites
Next
Copyright
© 1998-2016 Mike Doughty, All Rights Reserved Legal
Notices
Page Last Revised: October 26, 2016
Privacy Policy
|
|
|
|
|
|
|
|