|
|
Photo Retouching with Photoshop®
Levels Adjustment - Part 1C |
 |
|
|
|
|
|
|
11. Find an area with the most neutral midtones in the image and click the dropper once.

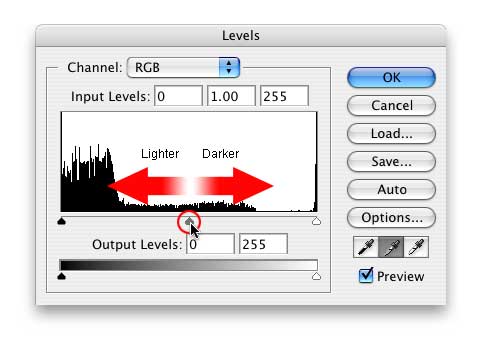
12. Next, we want to shift the midtones of the image to lighten them slightly. The center triangle at the bottom of the histogram is the gamma adjustment for the Input Levels. Dragging this triangle to the right will darken the midtones, while dragging it to the left will lighten the midtones.
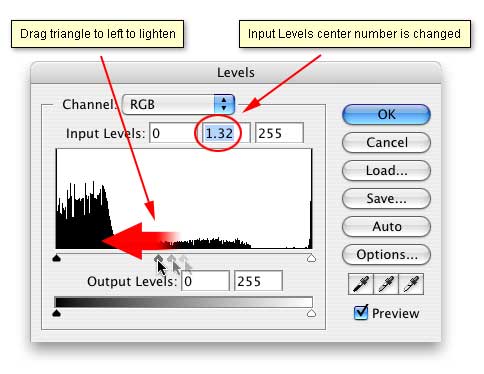
13. Drag this triangle to the left just slightly. Make sure the Preview checkbox is checked so you can see the effect of this adjustment as you make it. After you make the adjustment, you will see a change in the center box of the Input Levels just above the histogram.
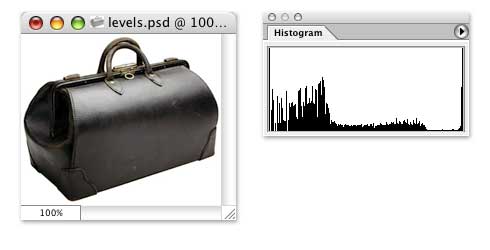
14. This is a view of the image after the Levels Adjustments. Also please note the histogram to the right, below and compare this with the first view of the histogram at the beginning of the tutorial before any adjustments were made. The tonal values for the pixels have been redistributed.
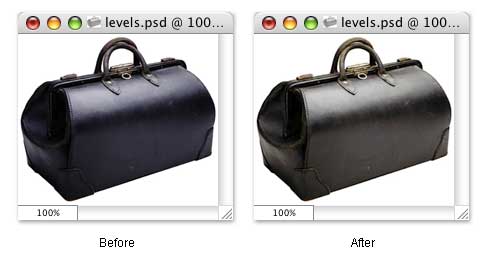
15. Below are screenshots of the image before and after the Levels Adjustments. More retouching can be done with this image but the levels Adjustment has made a big difference. You can see the detail and yet the tonal values are still in good balance. The image is neither overexposed or underexposed.
|