|
|
Canvas
6™ Technical Manual Project
Part 3F - Build The Document |
 |
|
|
|
|
|
|
Return
To Technical Manual Project Index
42. Keep the Align palette close by for now. Using
the Text tool  drag out a text object over the circle.
 |
|
Tip: A text
object created with the Text tool will allow you
to set the column width but not the column height.
A text object created with the Text Object tool,
however, will allow you to set both the column width
as well as its height. In this case we want the
text object to be smaller than the circles. Using
the Text tool will ensure that the height of the
text object will remain at a minimum so we only
need to adjust the width. |
43. When the text cursor appears, type the numeral
"1". Highlight it to apply text formatting.
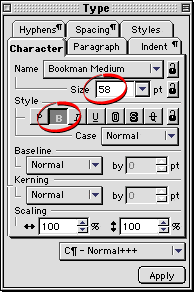
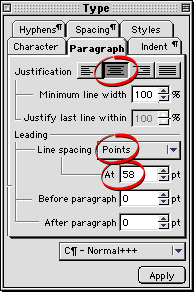
44. Choose 58 point Bookman Medium, Bold with 58 points
of Leading, center justified. Use either the Type palette
(below) or the Text Ruler to make the changes.
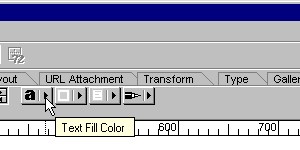
45. Click the Text Fill Color button on the Text Ruler.
46. In the Inks palette on the "Color" tab,
click the white tile.
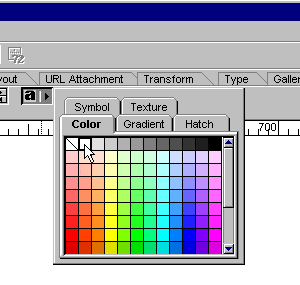
Note: The same Inks palette
appears in many places throughout the Canvas interface.
47. Use the Selection tool and position the text object
vertically in relation to the circle until it appeals
to you. Do not worry about its horizontal position.
We are going to use the Align palette for that.
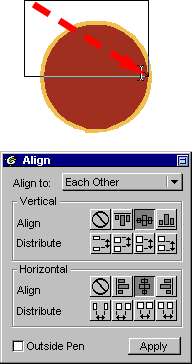
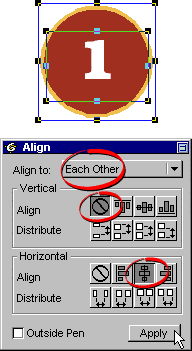
48. Adjust the width of the text object until it is
narrower than the circles. Then select both the text
object and the group of circles. Use the Align palette
and choose align to "Each Other" and click
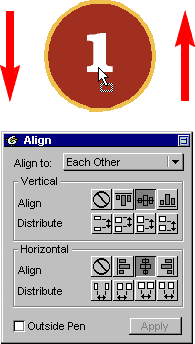
the button for aligning to horizontal centers but not
their vertical centers. Choose the buttons circled
below. Click "Apply" when done.
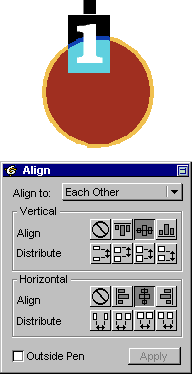
49. Now click Object > Group.

Note: In this step it becomes
clear that we wanted the text object to be narrower
than the circles because we want to be able to position
this group precisely with the Transform palette. Had
the text object extended beyond the bounding box of
the outermost circle, positioning it as a group would
have been more difficult.
Click
Here To Continue...
|