|
|
Understanding
Transparency Masks In Canvas™ 6 - Part Three |
 |
|
|
|
|
|
|
Channels And Masks
In Canvas 6 you can use the Channels palette to create
an alpha channel from a channel mask and vise-versa.
This can come in handy if you want to remove the channel
effect but save the mask as an alpha channel or for
porting selections from one paint object to another
(more
here).
10. To save a channel mask as
an alpha channel bring up the Channels palette and drag
it from the Channel Mask slot (below left) upwards and
drop it as an alpha channel (below right).
11. To create a channel mask
from an alpha channel bring up the Channels palette
and drag it downwards from the alpha channels (below
left) and drop it into the Channel Mask slot (below
right).
Creating A Vector Transparency Mask From A Vector
Object
You can also create a vector object and convert it
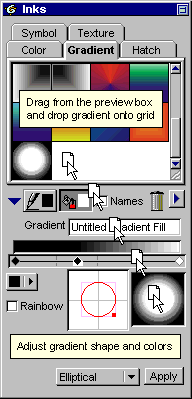
into a transparency mask. Bring up the Inks palette
and use the Gradient manager to create a new gradient.
 |
|
12. Adjust the gradient shape and color spacing
then drag and drop the new gradient from the preview
box into the grid with the other gradients. |
13. Create a new text object, then using the Rectangle
tool  create a rectangle and fill it with the new gradient
created in the previous step.

14. Select both objects and click Object > Transparency
> Attach Mask.

15. Next pull up the Transparency palette and click
the "Edit" button. Notice that the transparency
mask handles appear just as if the mask were created
using the Vector Transparency tools.

16. Next we will create a channel mask for the text
object. Clear the vector mask by clicking Object
> Transparency > Detach Mask.

17. Click Object > Transparency > New Channel
Mask. A new paint object appears in edit mode.

18. Click Image > Select > All.

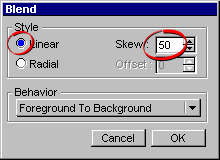
19. Next double-click the Blend tool  and in the dialog choose a Foreground To Background
linear blend with a 50% skew. Use the default foreground
and background colors (black and white respectively).
Click "OK" when done.
20. Drag the tool upwards like the example below, then
release the mouse.
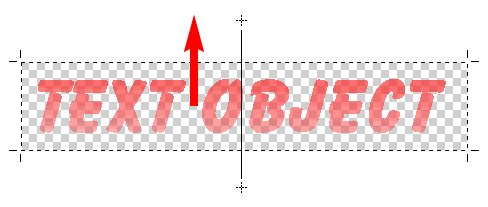
21. The resulting channel mask will apply a transparency
effect to the text object.

22. Just for fun, click Object > Transparency
> Detach Mask then drag the bitmap (paint object)
off the text object. You can see what the mask itself
looks like.

Click
Here To Continue...
|