|
|
| |
|
|
 |
| |
| |
|
Intermediate |
|
| |
|
|
Canvas™
7 Aqua Button Tutorial
Part Five |
 |
|
|
|
|
|
|
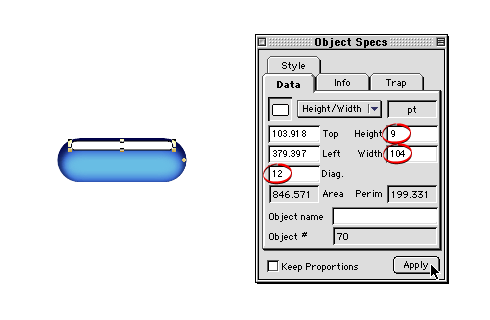
23. Next, bring up the Object Specs palette and enter
the specs circled below. The rectangle has a "Height"
of 9 points, a "Width" of 104 points and a
"Diag." of 12 points. Click "Apply"
when done.
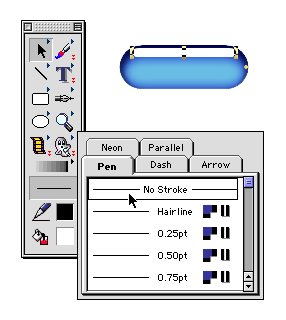
24. Next click the Strokes icon on the Toolbox and
choose "No Stroke" from the Pen tab. The rectangle
should now appear similar to the example below.
25. We want to give this new rectangle a gradient fill
from white at the top to medium blue at the bottom.
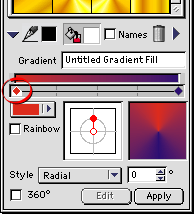
Start by bringing up the Inks palette and selecting
the "Gradient" tab. Then bring up the Gradient
manager. With an unselected gradient ink, the name of
the gradient in the manager should be "Untitled
Gradient Fill". Just under this box is a color
bar with pointers for the starting and ending colors.
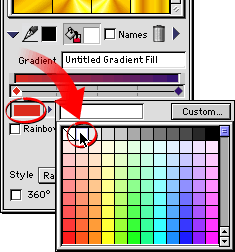
The pointer for the starting color is selected (circled
below left). You can tell it is selected because the
pointer is highlighted and the color icon (the button
just below the color bar) will be the starting color.
Click this icon (clircled below right) to access the
pop-up color palette. This is the same palette that
appears in the "Color" tab of the inks palette.
Choose the white ink (below right) for the starting
color.
Click
Here To Continue...
|
|
|
|
|
| |
Previous
Home
Contact Mike
Related Sites
Next
Copyright
© 1998-2016 Mike Doughty, All Rights Reserved Legal
Notices
Page Last Revised: October 26, 2016
Privacy Policy
|
|
|
|
|
|
|
|